The Battle of The Cracked Gate - A Warhammer Battle Report
A savage, feral wind screamed beneath a blood red sunset that raged and boiled against clouds dark as a tomb. Below was a sea of snow cold and blue as steel, where the trees huddled together for warmth. Mother rabbits held their kits close in their burrows. Robbins clung to their perches with bleached feet and dared not make a sound. Foxes and crows waited motionless in the dark with hungry eyes in anticipation of what was to come. The only movement came from five figures that darted and glided across the snowdrifts towards a waiting sixth.
The cold assailed Faerloc from every direction, probing his Lauralinae cloak for any weakness, needling his mouth through the holes of his facemask and pinching his eyes at every step as he strode forward from the rest of his Wood Wasp Scouts to stand beside the still figure of the Wishmaster. To the uninitiated it would be hard to believe that this hunched looking figure, leaning on the half-buried King's Longsword with a cloak wrapped tightly about him, was the ruler of the Meadows of Heaven and the one Faerloc called lord. Beyond the sword, the only outward sign he was not a vagabond was the steely commanding gaze with which he fixed the hulking monolithic silhouette of the distant castle far to Faerloc's right.
"Ill news I fear," said Faerloc as he stood next to the Wishmaster, "The dwarfs have undermined the southeast and northwest approaches to the castle. We will not be able to advance from those directions without running into traps or alerting the dwarfs to our intentions. Only the close perimeter of the castle walls is safe."
"Unfortunate," the Wishmaster replied without taking his eyes away from the fortress, "We will have to concentrate on the northeast and southwest instead, and trust in a more concentrated blow to break through."
"We are still to attack then?"
"Yes. We strike when the storm breaks."
"The storm winds will hinder our archery."
"It will hinder their missiles as well, which they will be depending on more."
"Lord Roland will not be pleased that we have laid waste to one of his keeps."
"The Kegh-Mon knows full well the particulars of his treaty with us and the consequences of harbouring fugitives. He has granted enemies of The Wood refuge, who have dared to strike at a Glamourweave and one of The Four. His fort is forfeit as is the lives of those within it."
Faerloc gave a short nod. "Very well then," he said, "I shall inform the kinbands to prepare for assault. The Forest shall have its blood."
A few months ago the local gaming store I frequent put on an all-day launch event for the release of TOW. As a ride-or-die 6th edition diehard (well OK I like 7th and 8th too, but ONLY with 6th edition army books) I had originally planned to give the event a miss and leave the TOW fans to have fun with their new game in peace.
But one of my regular gaming buddies was bitten hard with the Warhammer bug from it, and their enthusiasm is frankly dangerously infectious, and they were eager to run a side-by-side comparison to see how TOW stacked up with 6th edition (which is their normal mainstay for Warhammer), and so after applying a bit of arm torsion managed to rope me on board.
Since there was promise of a 6th edition Warhammer game, I also decided that such a high profile event would be a good opportunity for me to put into motion my own secret plan to get more of my figures on the table. Thus I spent the two weeks leading up to it feverishly working on some siege equipment, and come Saturday I unleashed...
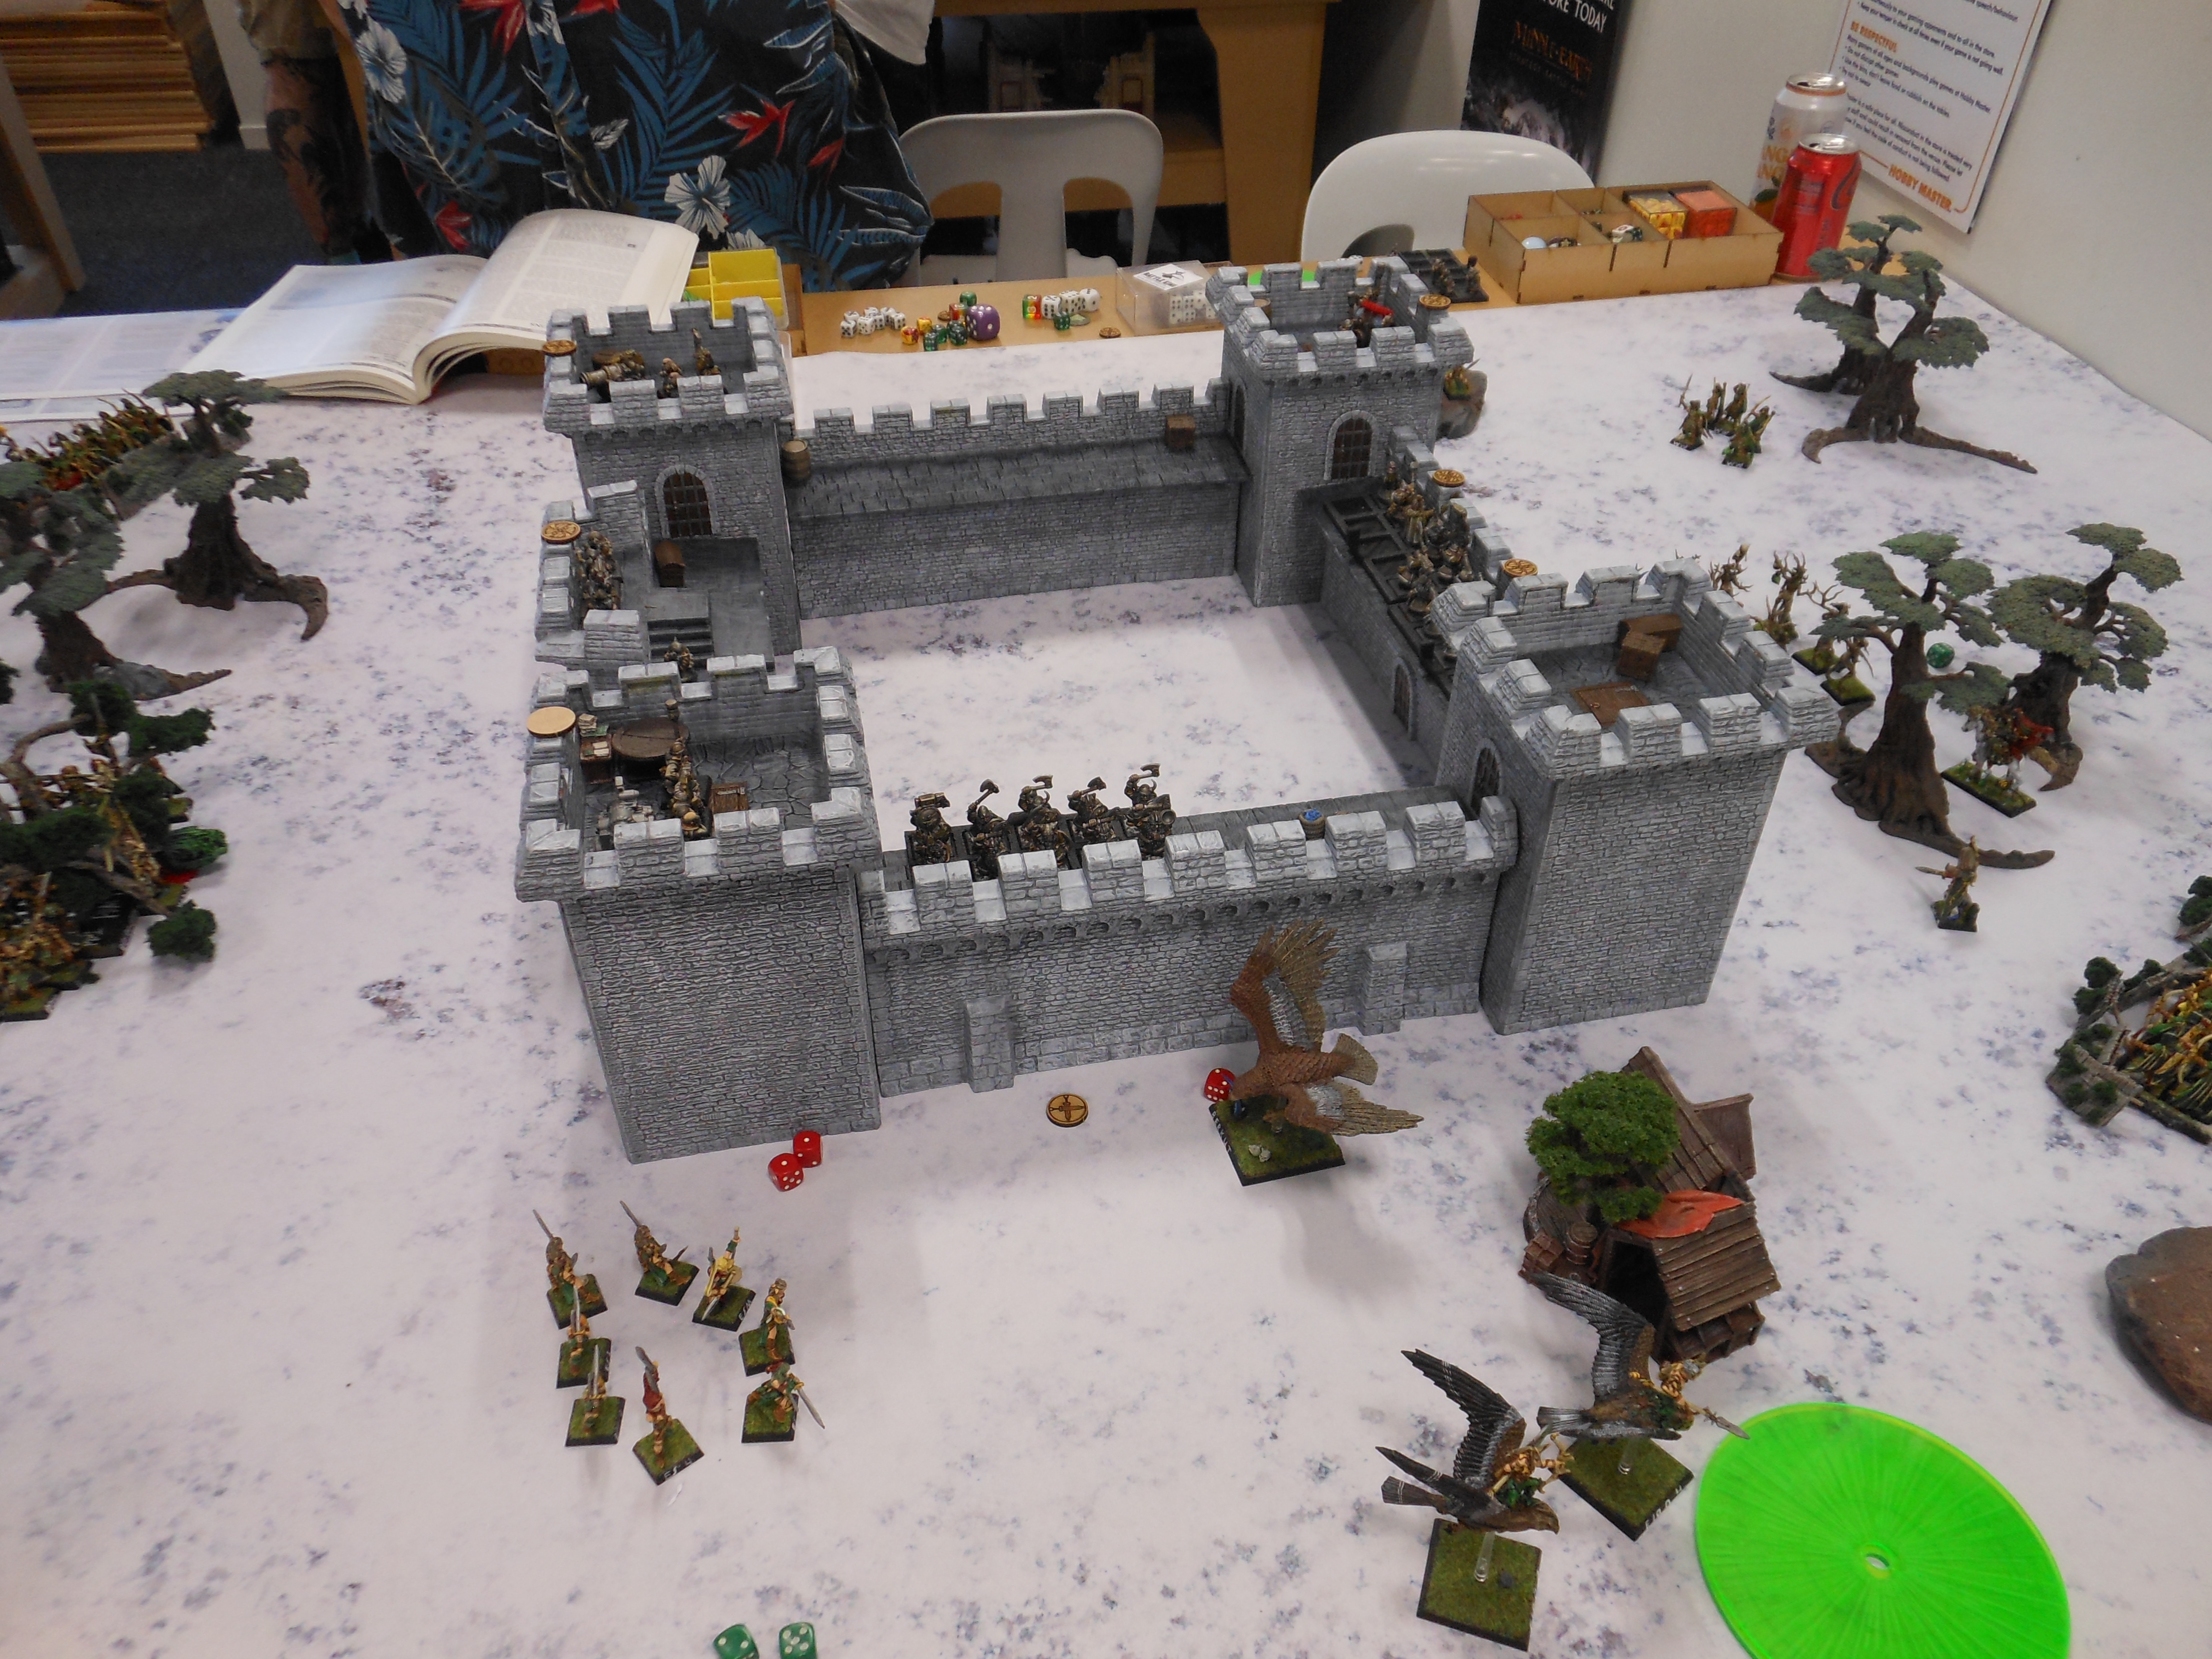
... THE CASTLE.
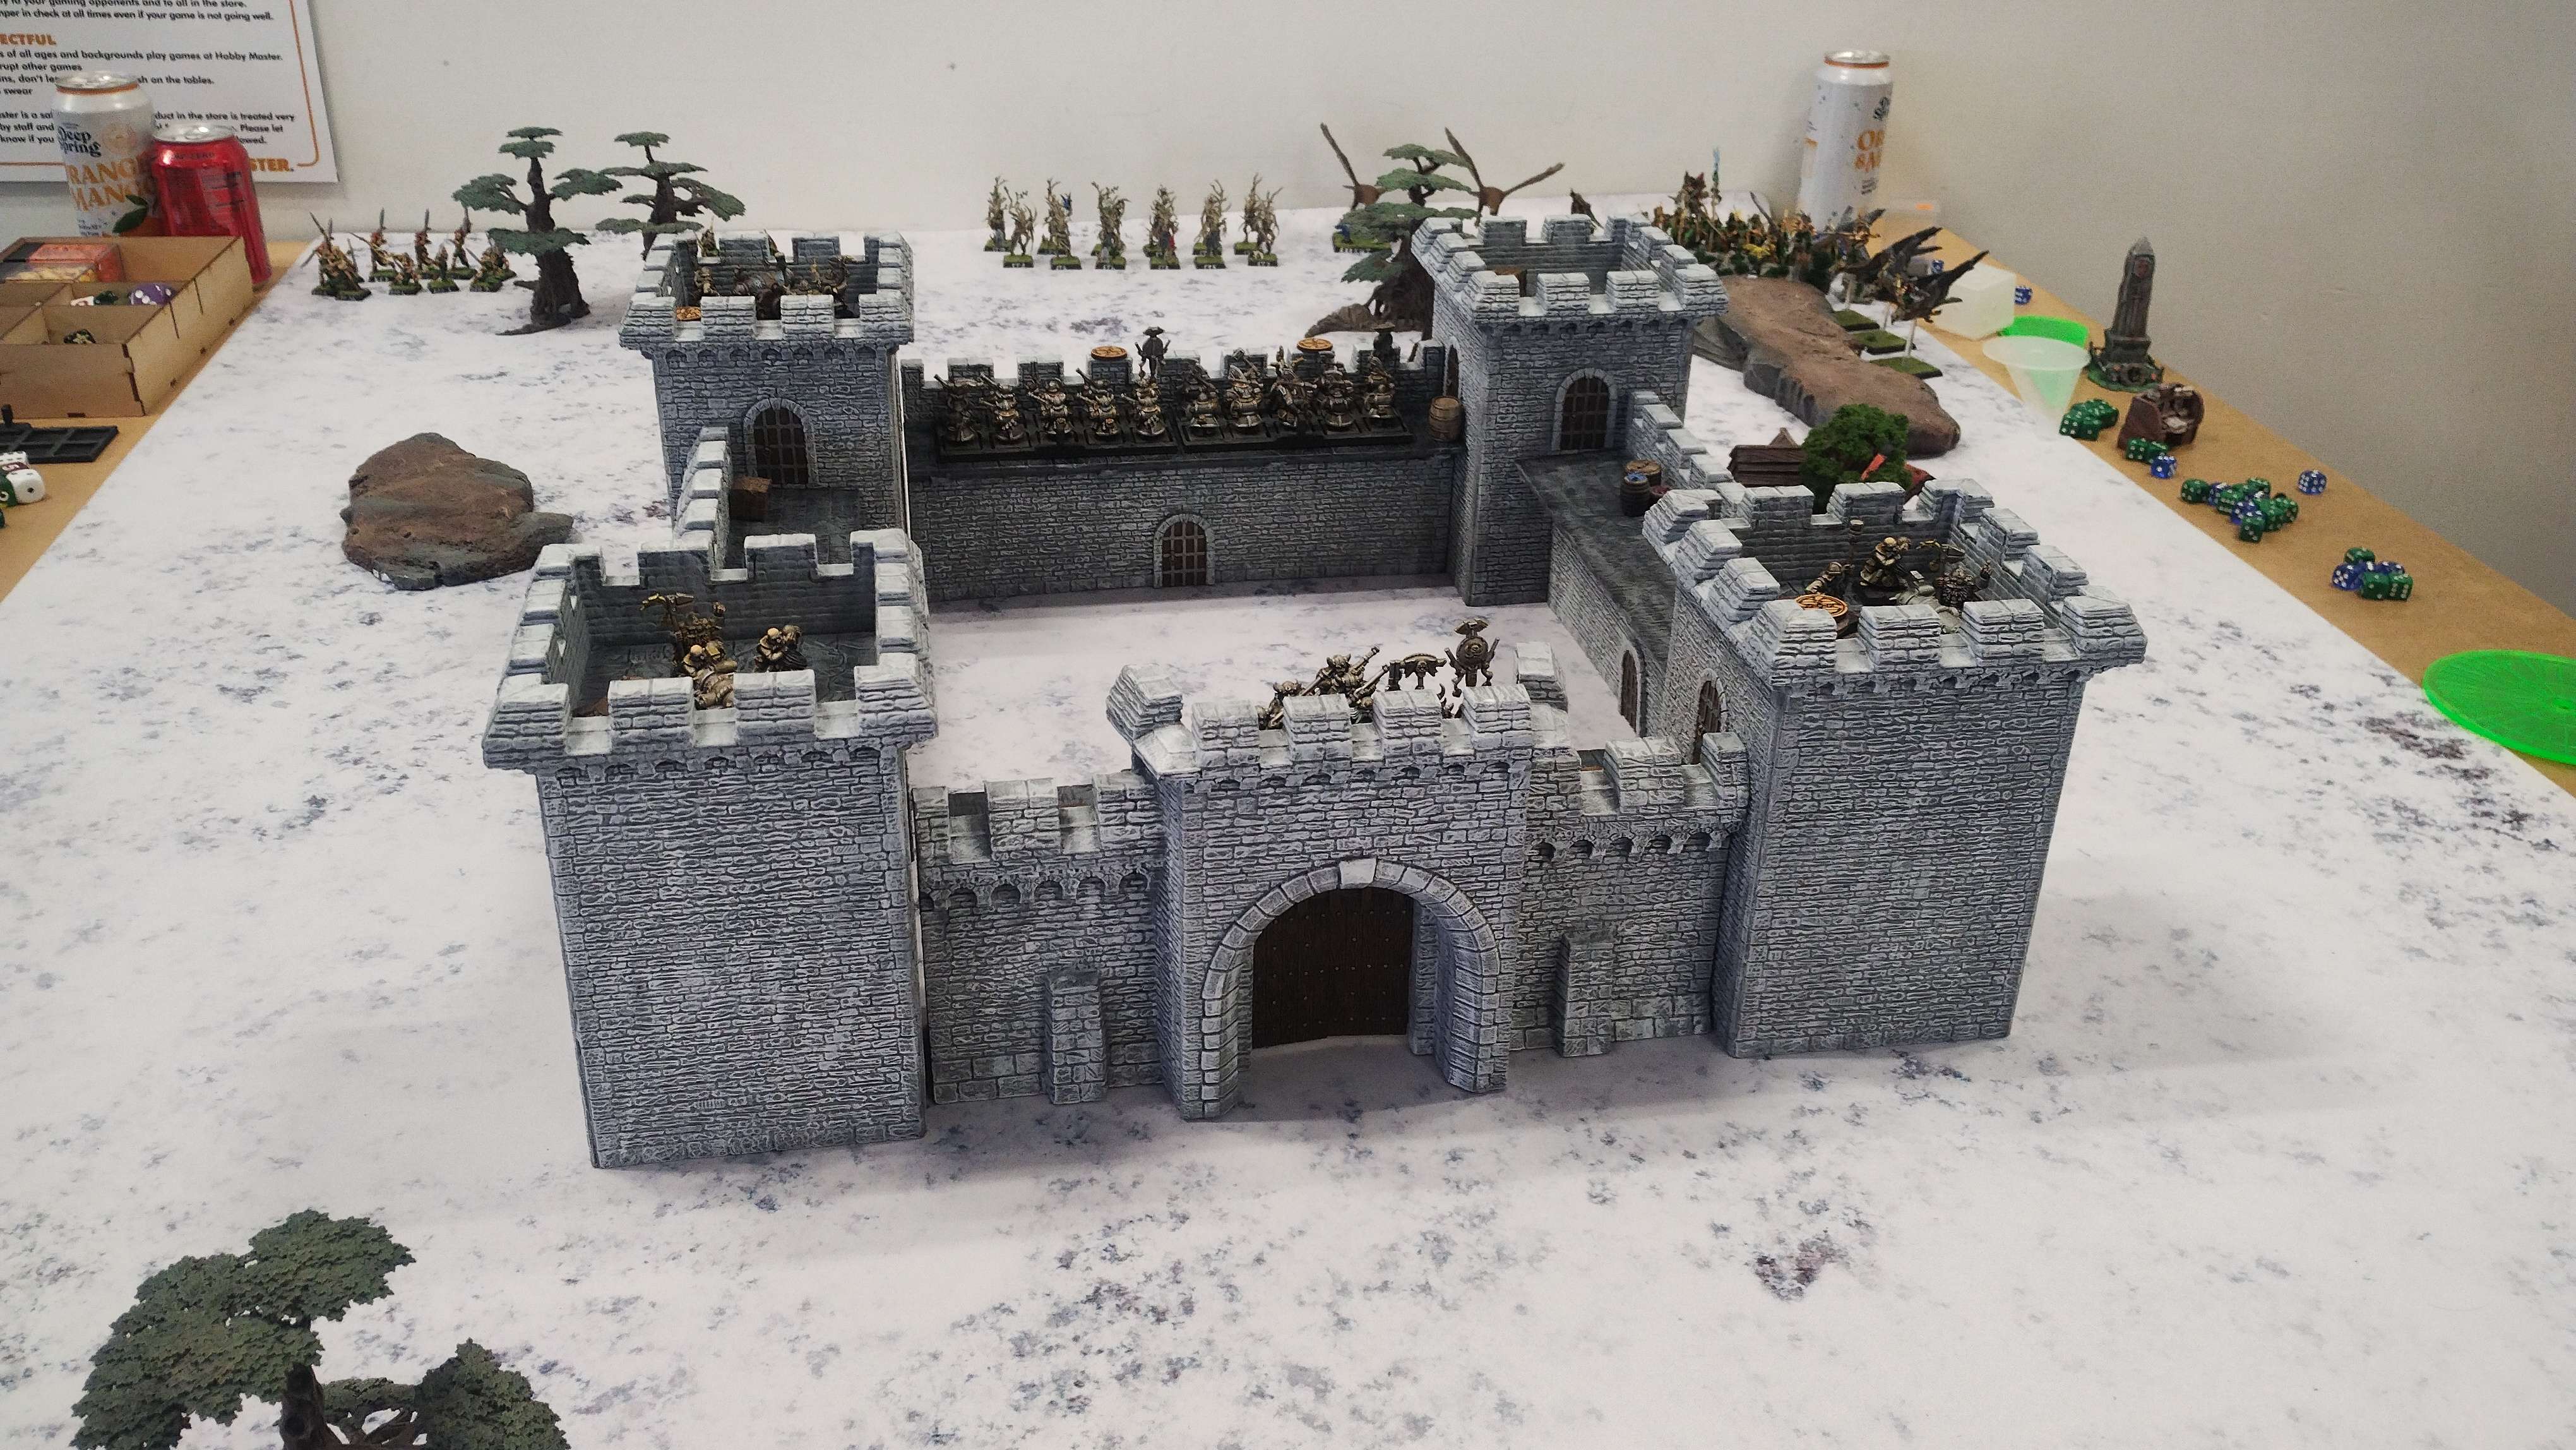 |
| The Castle |
Thus was the genesis for what was to become the Battle of The Cracked Gate.
In the year 1044 the roving band of Dwarfs known as the Folk of the Fell Cellar were enjoying a rare respite from their endless flight across the wilds of the old world. Following their ill-fated ambush of a Spellsinger from the Meadows of Heaven the Wood Elves of that realm had hunted them relentlessly across the Grey Mountains for many long years and the Dwarfs were growing increasingly desperate.
But now the Folk of the Fell Cellar had been invited by Lord Rolland The Valiant to take up residence in one of his border castles while the Bretonnian lord was away on crusade with his knights. As well as a pragmatic desire for additional security of his lands, Roland was motivated by a great sense of empathy for the vagabond Dwarfs. He also hoped that in return for his hospitality the Dwarfs would reward his good deed by sharing the secrets of Dwarven craftsmanship and architecture with his own artisans, who could then use that knowledge to further enrich his realm.
By the time word of this reached the Meadows Of Heaven it was already the end of autumn. Much debate was had about whether to attack immediately or wait until the following spring or summer, when the forest would be at its strongest, but it was decided that the castle would best be attacked at once, as if the Wood Elves waited the Dwarfs might be able to escape and go to ground, or worse become more entrenched, perhaps even establishing a hold of their own which would make them impossible to remove.
The attack was planned for the early weeks of winter, to make the most of what little power the forest could offer up in support, but incessant and extremely dogged raids by Goblin tribes driven back from Roland's borders ended up delaying the progress of the Meadows Of Heaven's expeditionary army, so they did not reach the castle until midwinter and were forced to detach their Waywatcher kinbands to act as rear security.
Nonetheless the Wood Elves roused what spirits and energy of the forest they could, and made ready to besiege the castle and make an example of the Fell Cellar folk once and for all.
Armies and Strategy
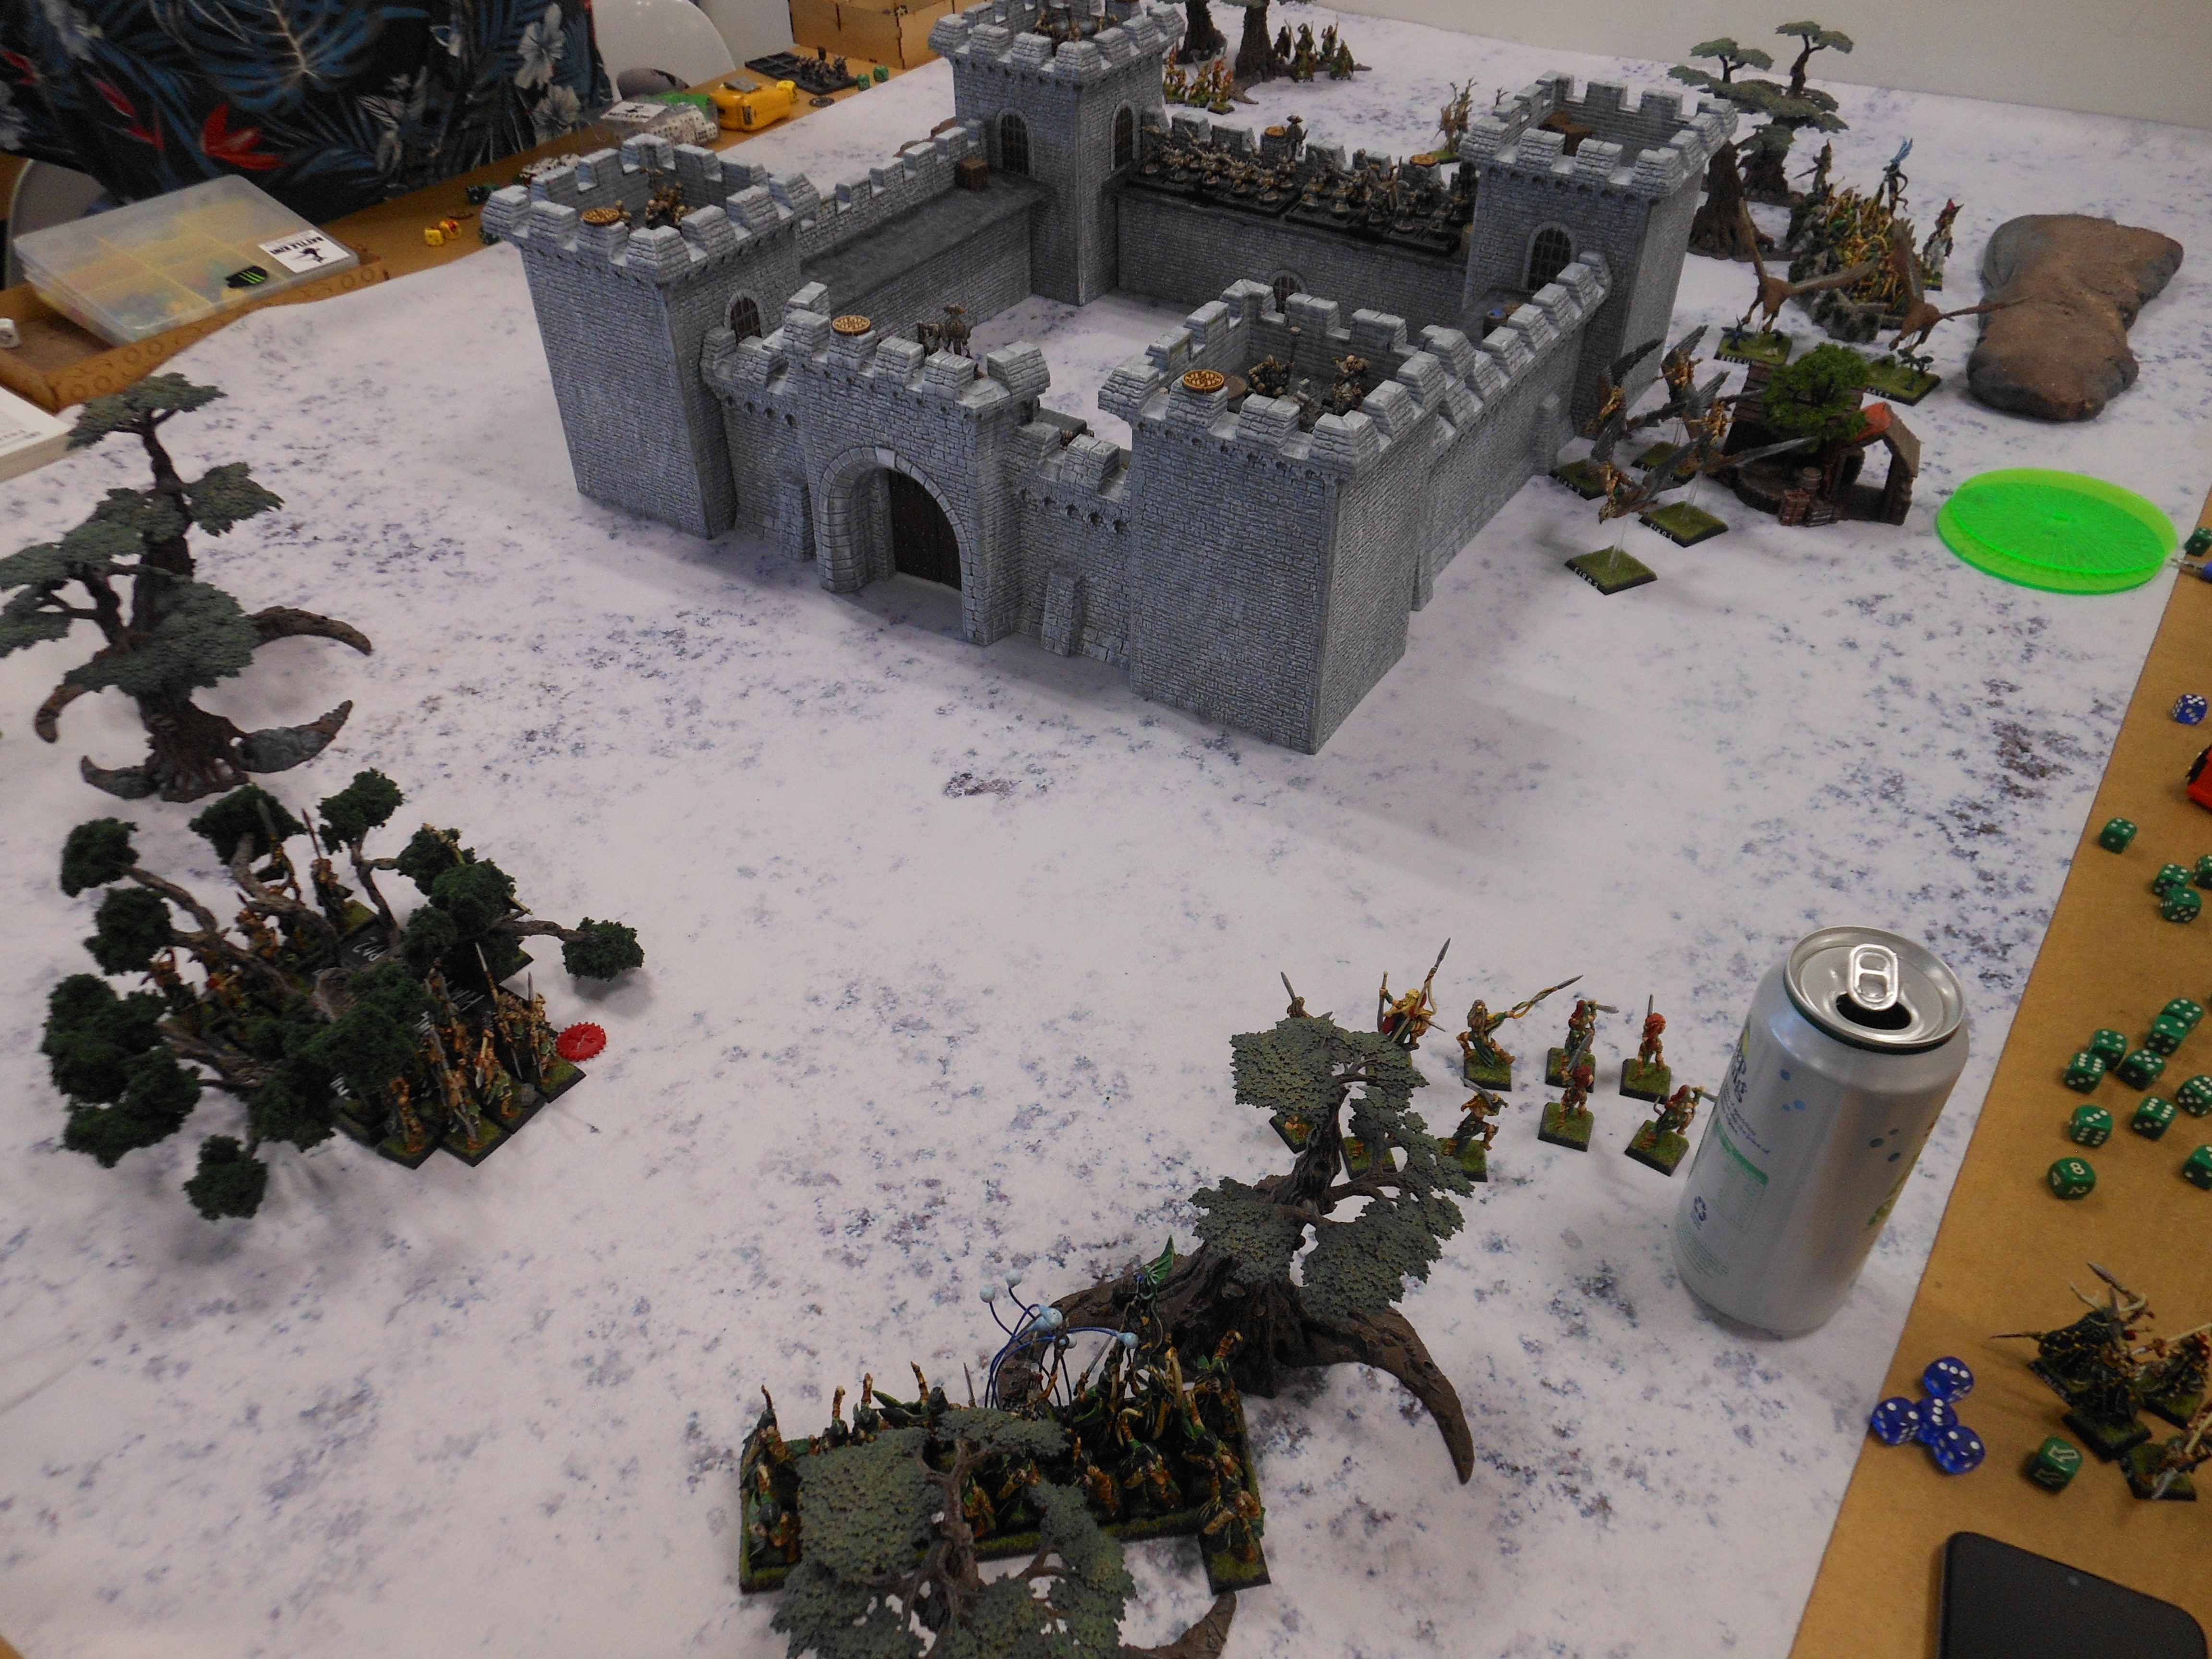
Since this will be my first Siege game, it will also be a first test of my overall Siege doctrine. Having pondered Sieges for many years, I have worked out a doctrine for attacking castles that leverages the Wood Elf advantages in mobility and hard-hitting combat skirmishers to attack multiple sections of the castle at once. With any luck this will stretch the defenders thinly enough that I can punch through and capture the ramparts in at least one sector, or better yet create a hole or two in the castle's defenses that I can exploit to get onto the walls uncontested.
That starts with having some hard-hitting assault troops, and for that purpose I've gone with two healthy sized units of Wardancers. Excellent fighters in most situations, their Shadow Dances of Loec give them a fantastic swiss army knife of tactical options for both offensive and defensive situations, and their immunity to psychology should help with any Panic tests they need to make on approach. These two units will be spearheading the assault on the sides of the castle.
Helping the Wardancers out will be a strong mobile reserve of flyers in the form of two Great Eagles and four Warhawk Riders. These forces will use their speed to quickly dart over to one of the castle's sides and attack with the Wardancers there. My experience so far has shown that it usually only takes a small few extra attacks to tip a combat decisively in my favour, and I'll be counting on these fast moving units to do just that in the right place at the right time.
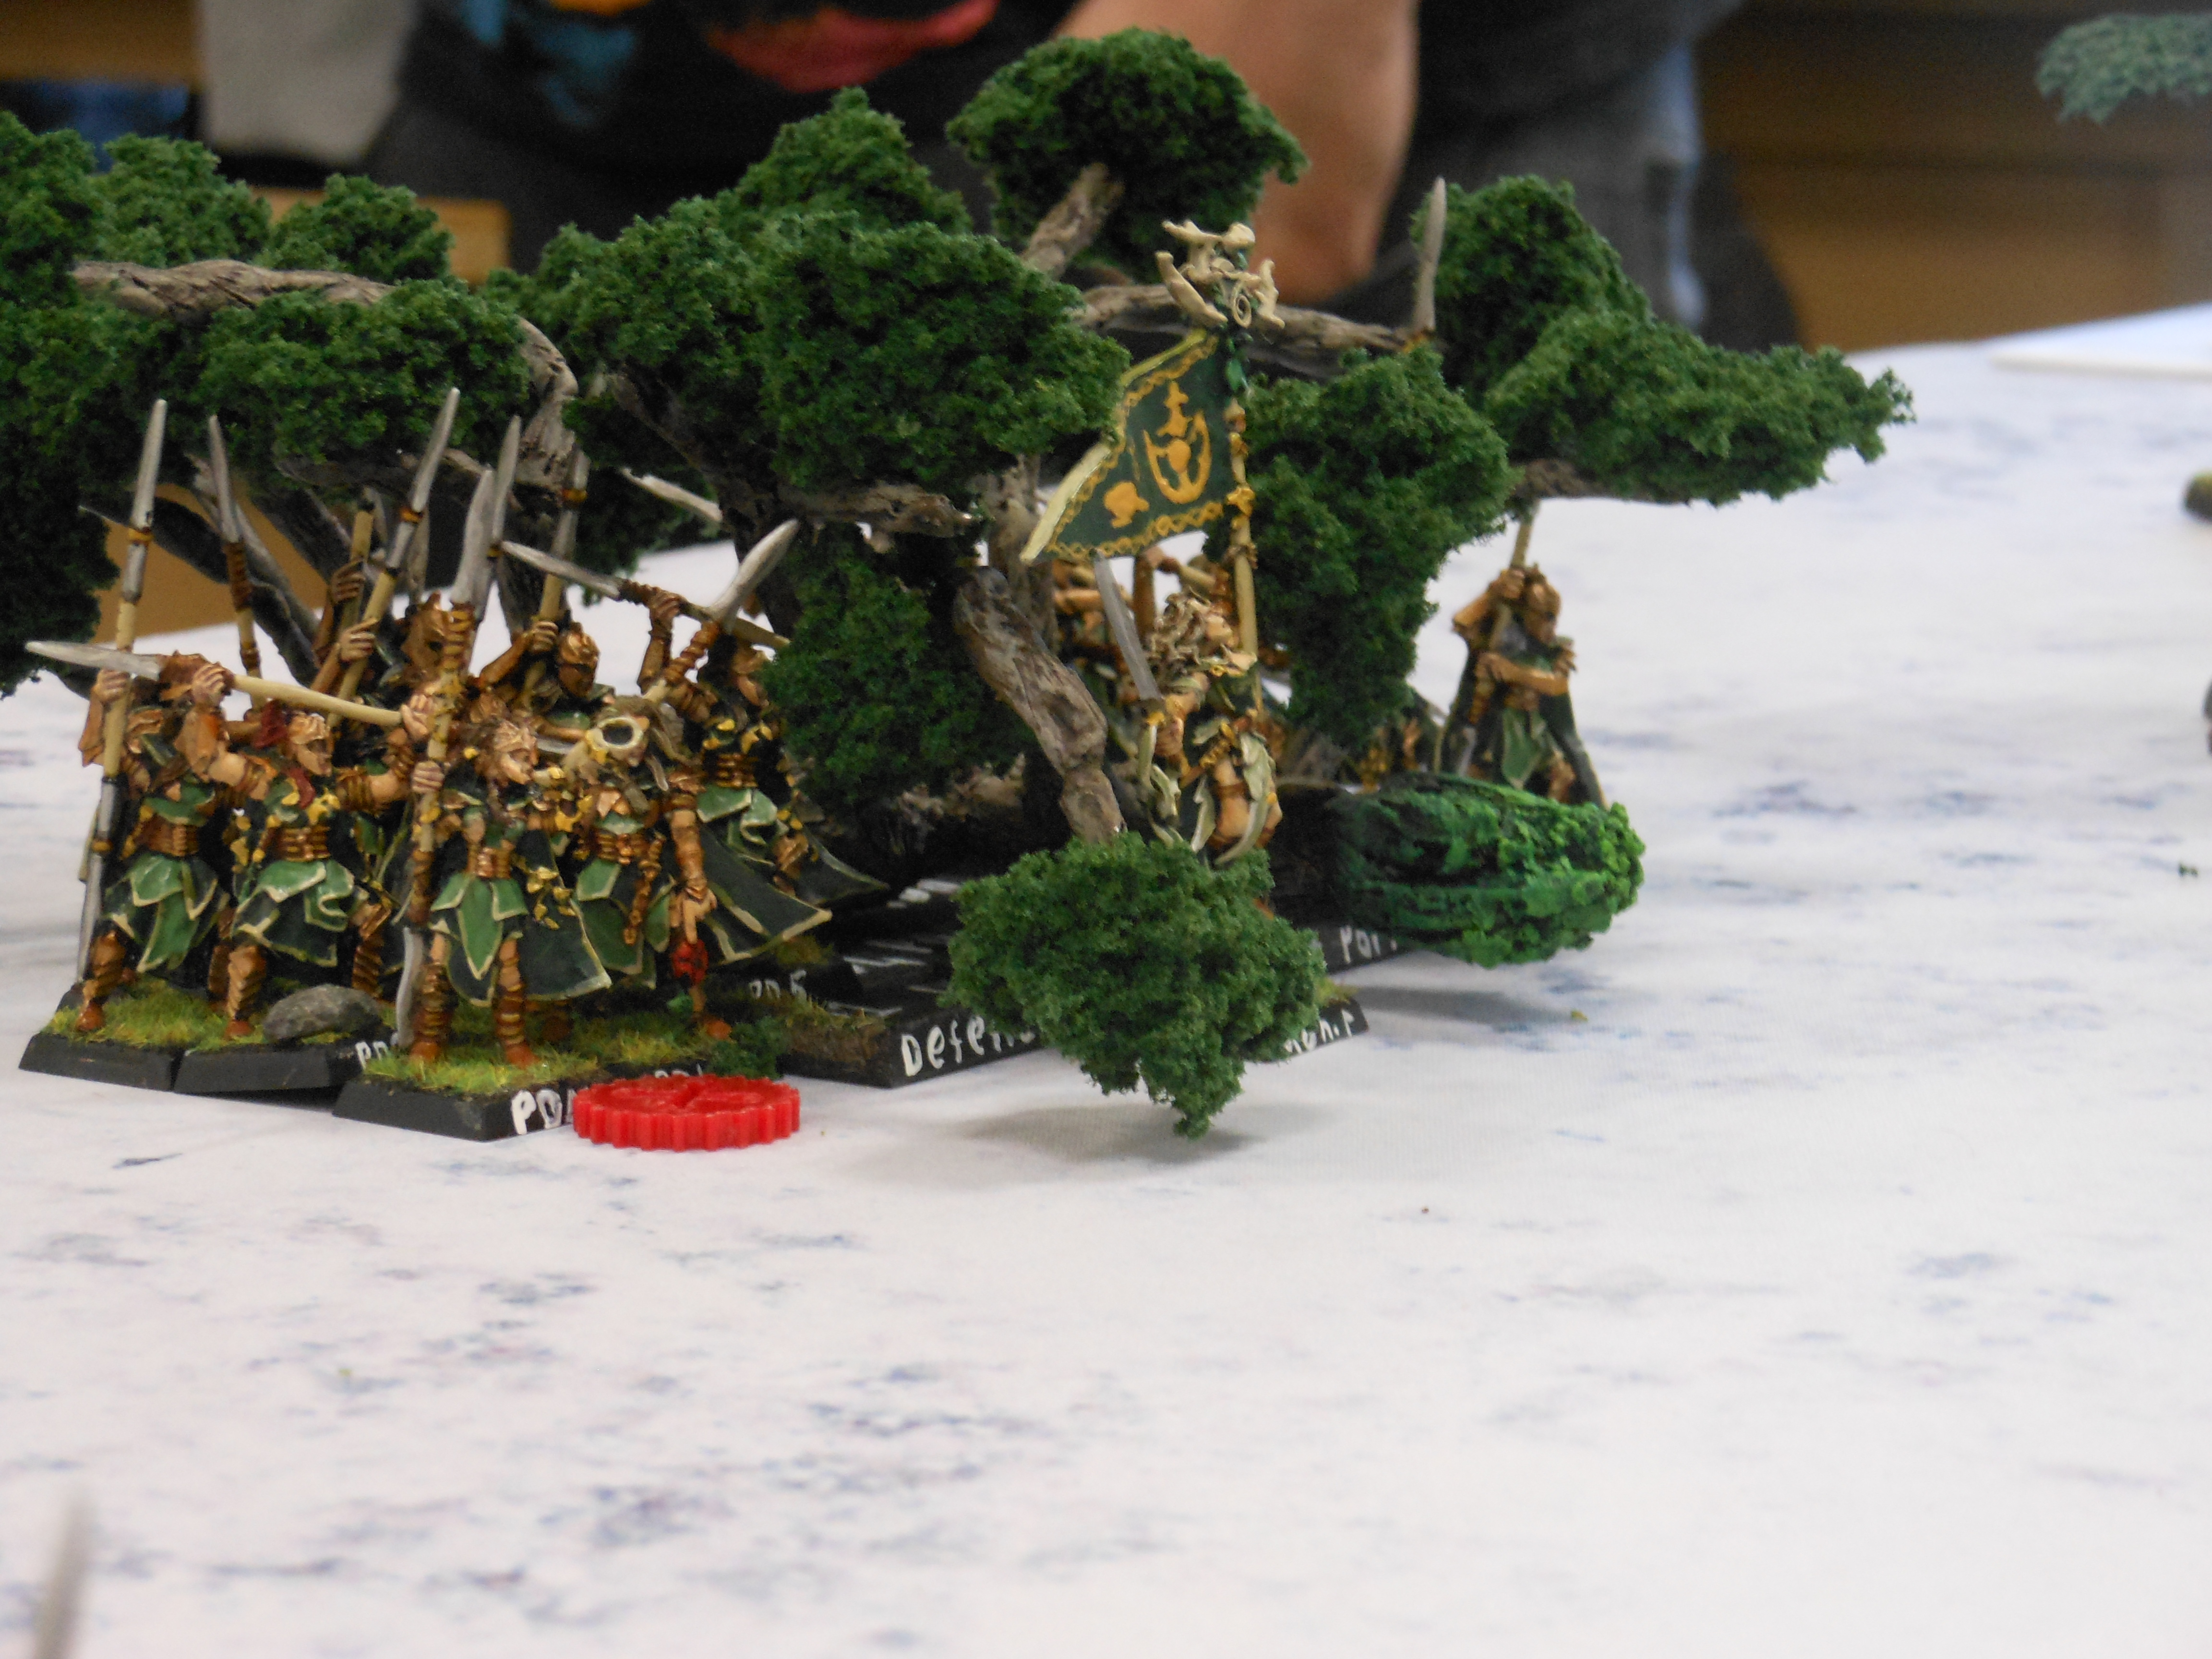
Meanwhile I plan to draw the Dwarfs' attention away from the sides of the castle with a formidable frontal assault on the castle's gate, and for this purpose I'm turning to my very best - the Defenders of The Glade of Poppies, a full 20-elf regiment of Eternal Guard. This regiment has proven to be a star performer in just about every battle they've fought in so far, so I'm giving them the difficult and unenviable task of handling the battering ram and attacking the gatehouse head-on. With any luck their 5+ armour save will help see them through the worst of the attention they can expect to receive, and once in the courtyard they should prove very difficult to shift.
I also want a token diversionary force to attack the rear wall - I'm not expecting much from them, but with any luck this feint will keep pressure on any defenders there and keep them from reinforcing the locations of my real attacks. And there is no better unit in the Wood Elf army for this task than a nice healthy group of Dryads. Their excellent blend of combat power, endurance and cost make them perfect for these kinds of throwaway missions and tying down disproportionately large parts of the opposing army.
With all the main elements of the army in place, it's time to look at support for them. My first choice for this is no less than three good-sized units of Glade Guard to provide plenty of shooting cover for the assault forces. Two of these regiments have been equipped with mantlets, to get them closer to the castle so they can use their extra powerful short-range shooting attacks, as well as to give them some extra protection from the inevitable Dwarf return fire. The third will have to make do without them, because I was only able to build and paint enough mantlets in time to equip two archer units.
 |
| The Wood Elves deploy under the cover of mantlets |
Now it's time for the Character support. As I'm only working with 3000 points I can only bring two Lord choices, and naturally I'm going to be making full use of both of them. The first is the Wishmaster himself, a Highborn general who will most likely be lurking around the battlefield lending shooting support and morale aid wherever it is needed most. His trusty Amaranthine Brooch should be able to defend against the worst of any Dwarf firepower that comes his way.
Joining him will be my Spellweaver, Aneaeth Ollissin, to provide some serious magic support for my frontal assault force and enchant the arrows from the Glade Guard unit she joins. If I can land a few healing spells on the Eternal Guard it should keep them mostly intact until they're planted firmly in the courtyard. To ensure some magic support for the other side of the castle I've also taken my Spellsinger, Ailyn, who also gives me my required beautiful Elven enchantress on a unicorn.
The last two characters will be Moniqeth, my faithful Battle Standard Bearer, to help rally the troops in the face of steep casualties and loose a preparatory barrage with the Hail of Doom Arrow, as well as Gaerielle, a solidly equipped combat Noble to help spearhead the gate assault with the Eternal Guard.
Finally, I have just enough points left over for a unit of Scouts to provide vital reconnaissance and surveillance of the castle. When the time comes they will also scale the walls with the Wardancers so they can disarm any traps that might be hidden inside the fortress, especially among the treasure chests.
Putting all that together produces the following:
Expeditionary Host of The Meadows of Heaven
Lords
The Wishmaster - Highborn with Light Armour, Great Weapon, Bow of Loren, Amaranthine Brooch and Arcane Bodkins
Aneaeth Ollissin - Level 4 Spellweaver with A Resplendence of Luminescents, Wand of Wych Elm and Talisman of Protection
Heroes
Moniqeth - Noble Battle Standard Bearer with Light Amrour, Asyendi's Bane and Hail of Doom Arrow
Gaerielle The Twilight Storm - Noble with Light Armour, Spear of Twilight and Helm of The Hunt
Ailyn - Level 2 Glamourweave Spellsinger with Calaingor's Stave and A Pageant of Shrikes, mounted on a Unicorn
Core
The Spirit of Spring - 16 Glade Guard with Full Command and Mantlets
Forever Autumn - 16 Glade Guard with Full Command and Mantlets
Summer Lightning - 16 Glade Guard with Full Command
The Wood Wasps - 5 Scouts with Lord's Bowman and Grappling Hooks
Defenders of The Glade of Poppies - 20 Eternal Guard with Full Command, Banner of Dwindling and Log Ram
The Scaretale - 12 Dryads with Branch Nymph and Grappling Hooks
Special
The Dark Passion Play - 10 Wardancers with Musician, Bladesinger and Grappling Hooks
The Empty Spiral - 10 Wardancers with Musician, Bladesinger and Grappling Hooks
Élan - 4 Warhawk Riders with Wind Rider
Rare
Haast - Great Eagle
Berkut - Great Eagle
The opposing Dwarf force consisted of the following
The Folk of The Fell Cellar
Lords
Lord of the Fell Cellar - Dwarf Lord with Rune Axe with Master Rune of Skalf Blackhammer, and unknown runes
Core
Warrior Clan - 10 Warriors with Hand Weapons, Shields and Full Command
Warrior Clan - 10 Warriors with Hand Weapons, Shields and Full Command
Thunderer Clan - 10 Thunderers with Full Command
Thunderer Clan - 10 Thunderers with Full Command
Special
The Golden Gun - Cannon with Engineer with Great Weapon, Master Rune of Defence and unknown runes
The Silver Gun - Cannon with Engineer with Great Weapon, Rune of Forging, unknown runes
The Steel Gun - Cannon with Engineer with Great Weapon, unknown runes
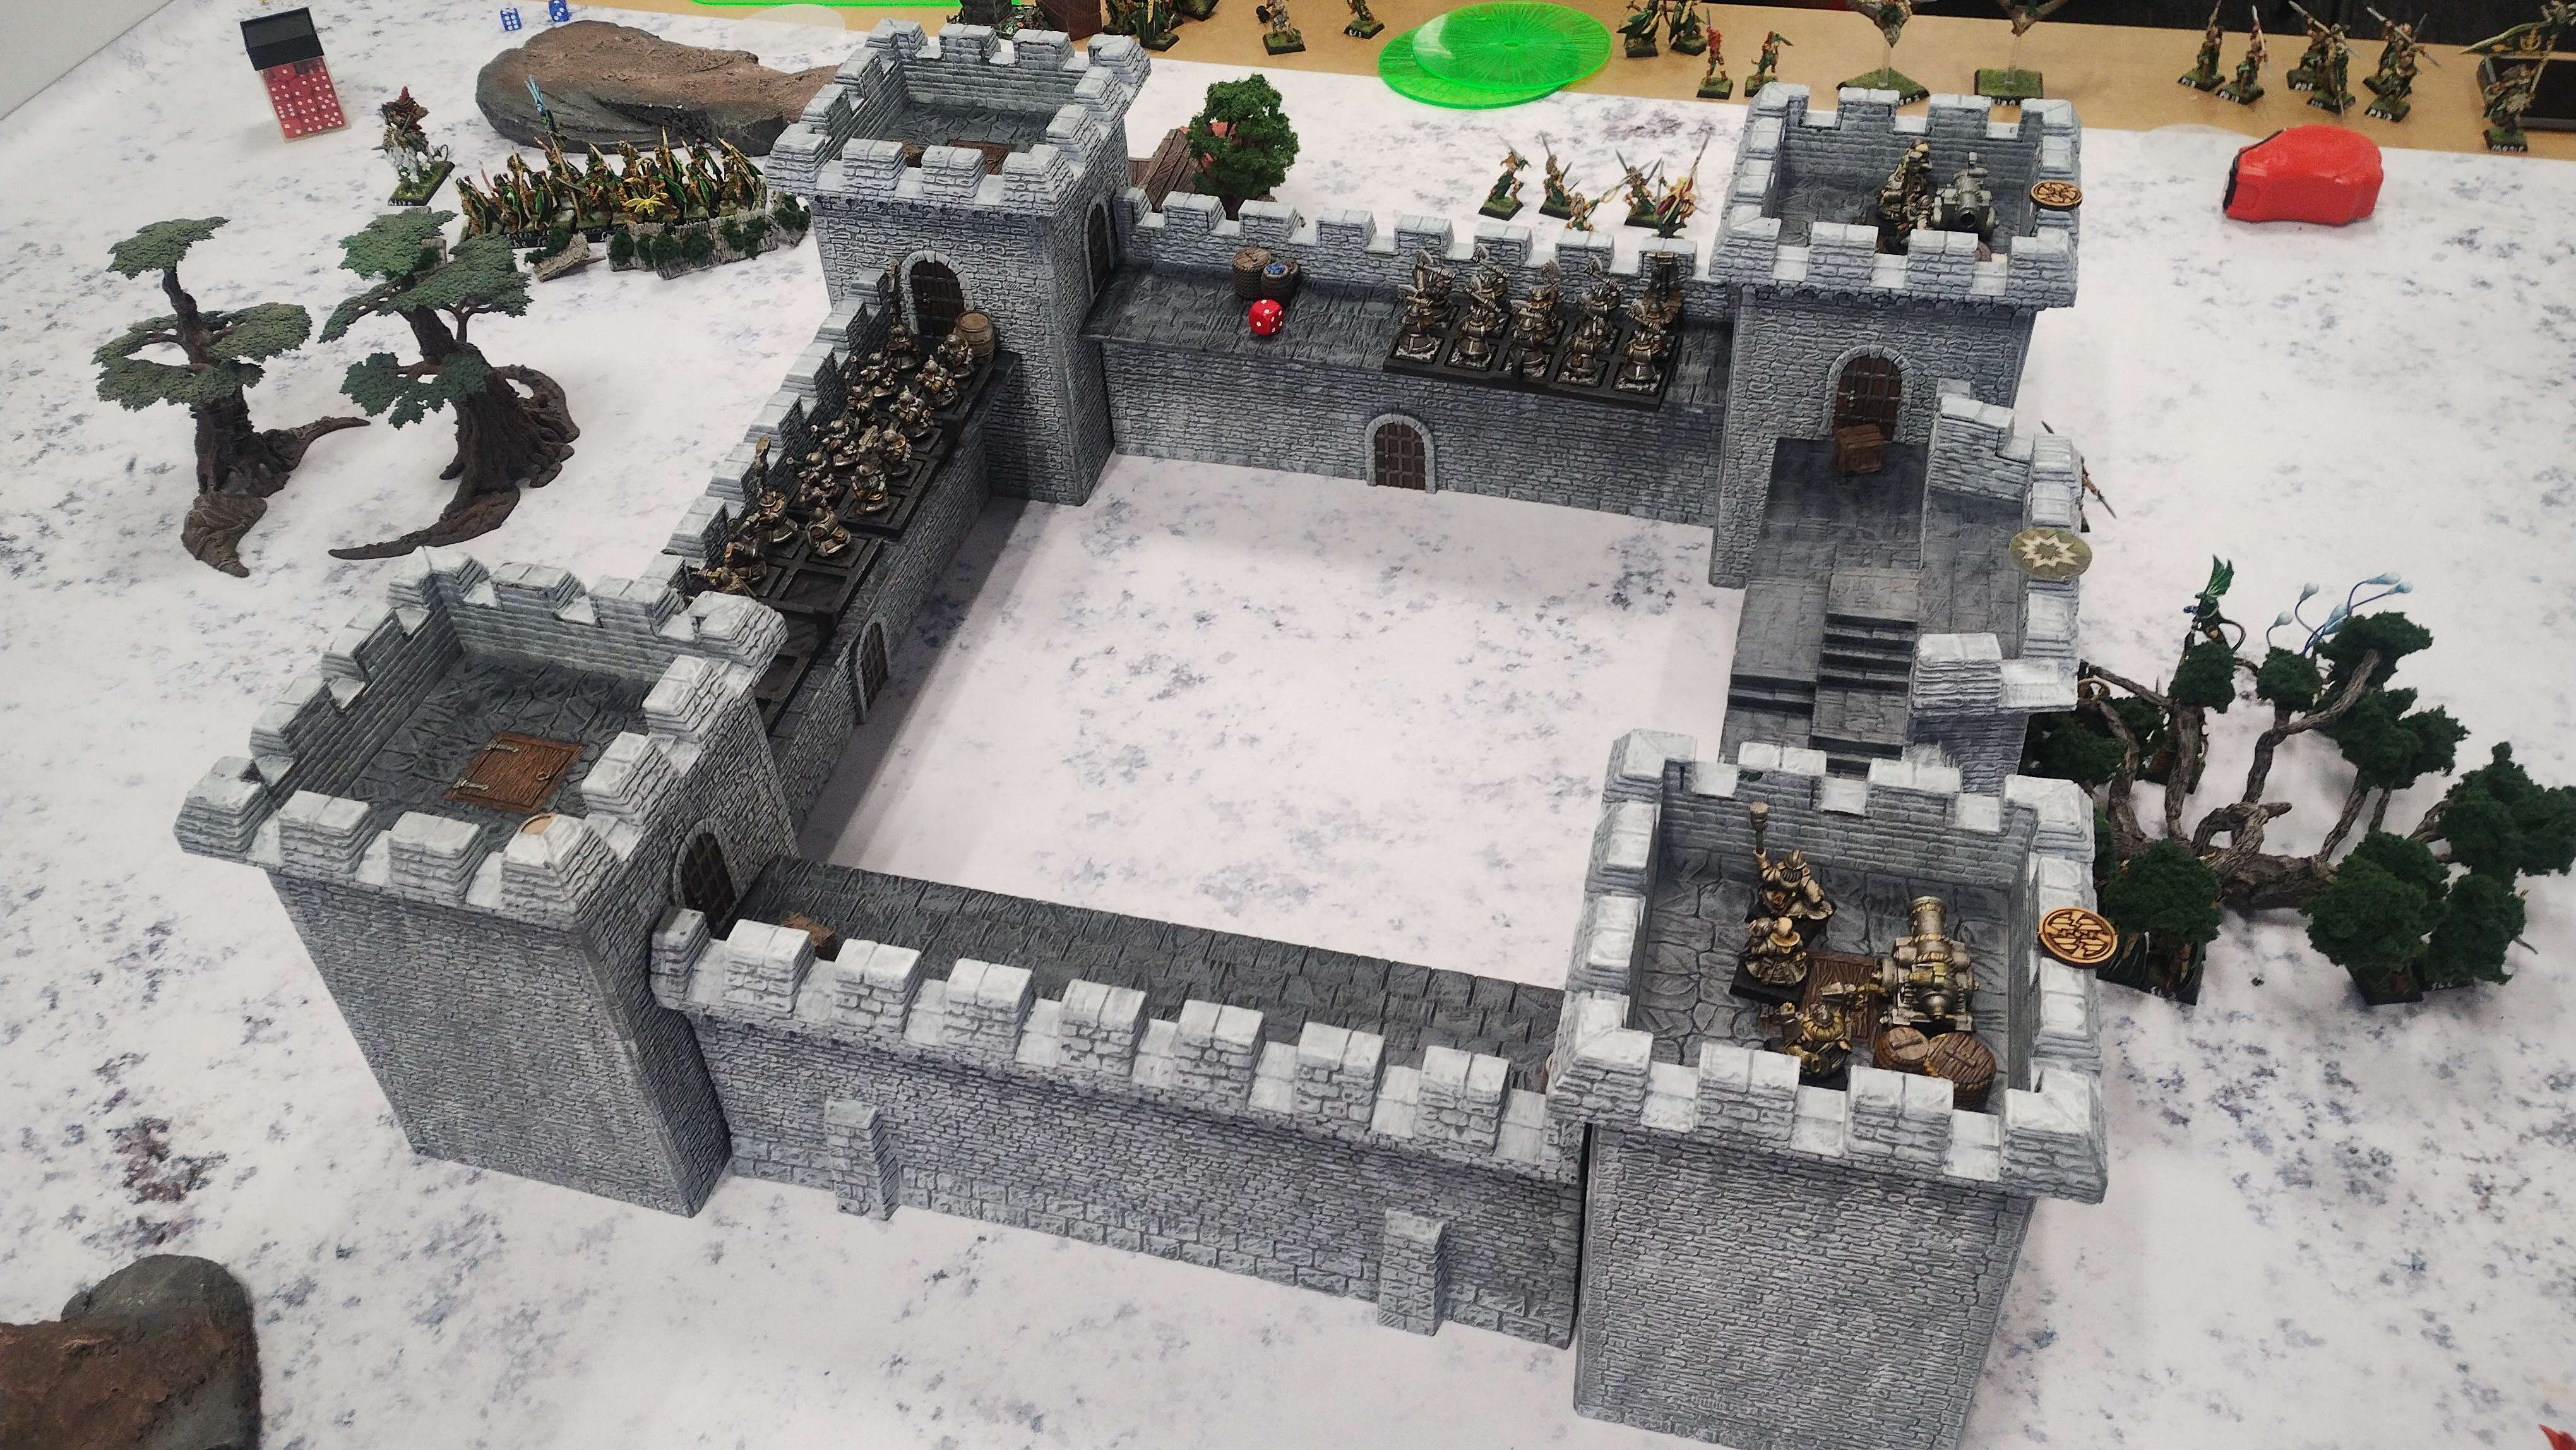
Defences
5 cauldrons of boiling lead
Reinforced Gate
If this looks like two Battle for Skull Pass Dwarf sets stitched together into a coherent army list, it's because that's exactly what it is.
 |
| The Dwarfs muster their forces in the castle grounds |
Warhammer Siege - The Battle
Deployment and Spells
As the attacking player I get to deploy my entire army first, and it is here that I discover to my horror that the store's tables are actually quite a bit narrower than they first seem, leaving quite a bit less than 24" from the sides of the castle to the nearest table edge. This pushes my carefully planned encirclement into a kind of hourglass formation as large chunks of my army are forced into the table corners.
Nonetheless I try to make do as best I can, and my deployment is as close to my original plan as I can make it. The Eternal Guard deploy with their ram dead front of the castle gate, as close as they can manage. Summer Lightning sets up with Aneaeth in some woods on their right, and the Spirit of Spring on their left. The Empty Spiral deploy right of Summer Lightning, as close to the castle's left wall as they can manage.
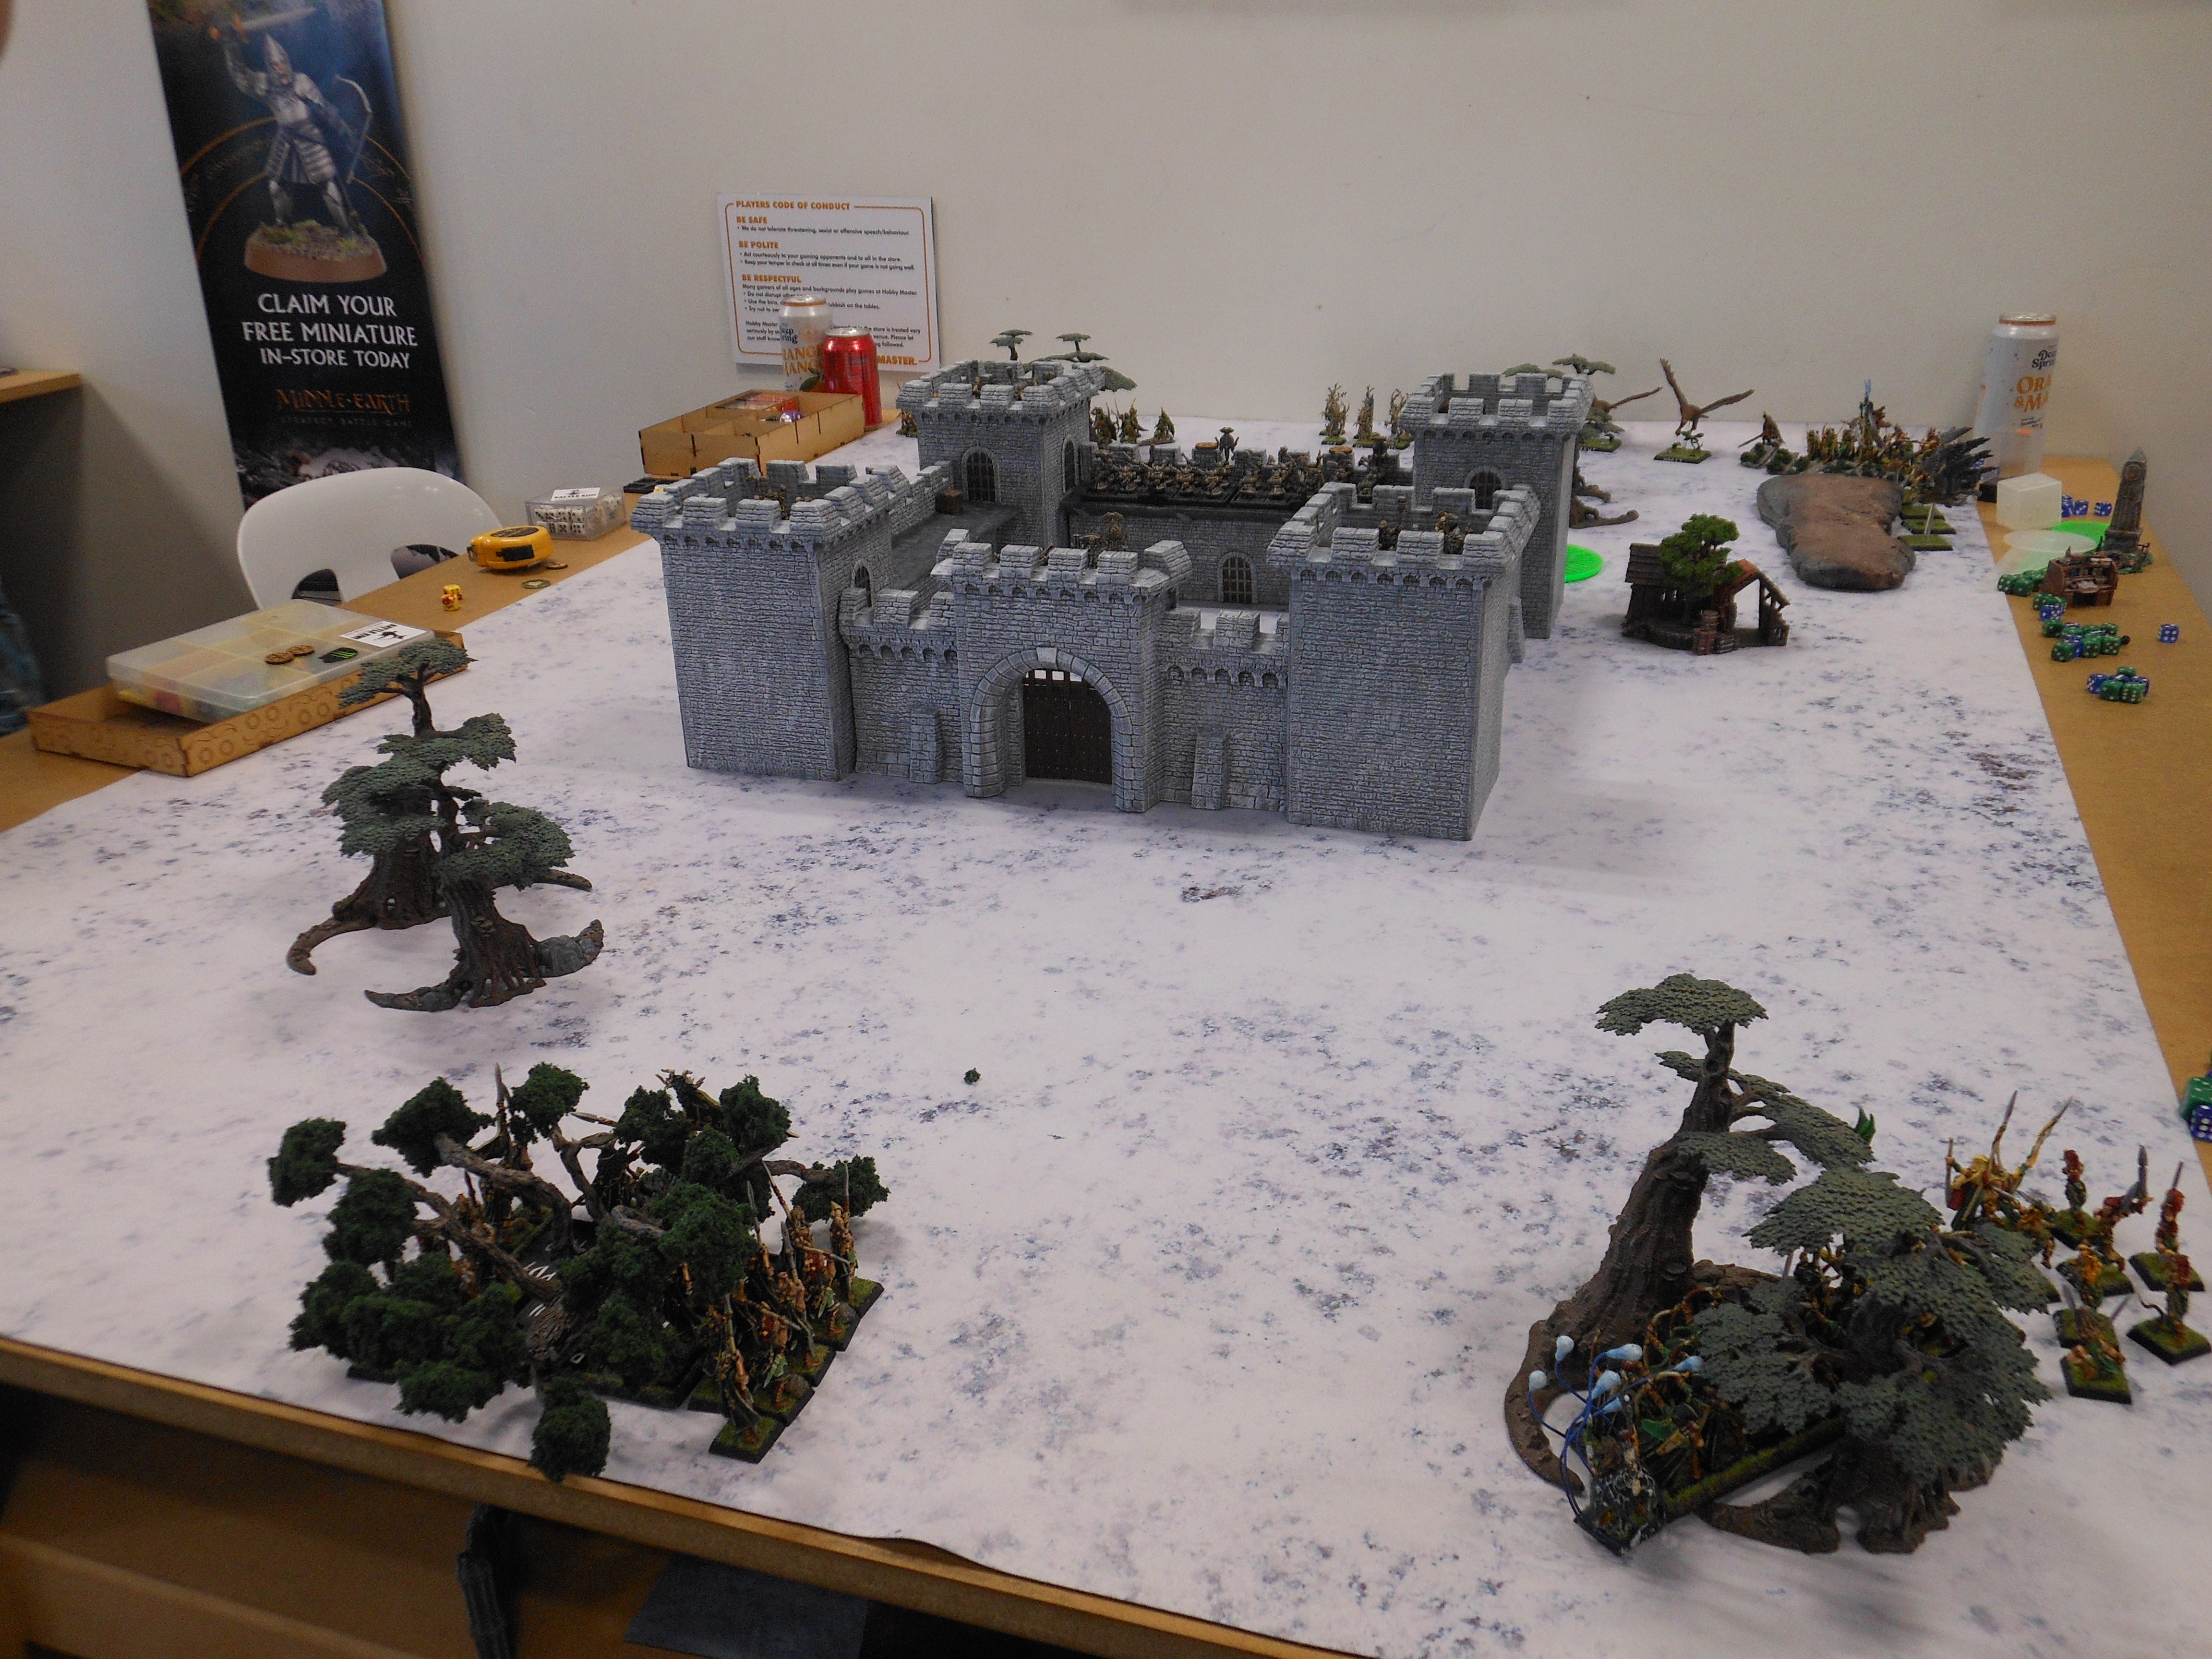 |
| Deployment at the front of the castle |
On the other side of the table, the Dryads line up facing the rear wall, with Forever Autumn on their left and the Scouts and Dark Passion Play on their right. The birds take up position either side of Forever Autumn, the Warhawks hugging the reverse slope of a nearby hill for whatever protection they can get. Ailyn sets up behind them, the Wishmaster next to the Eagles, and both Nobles with the Eternal Guard.
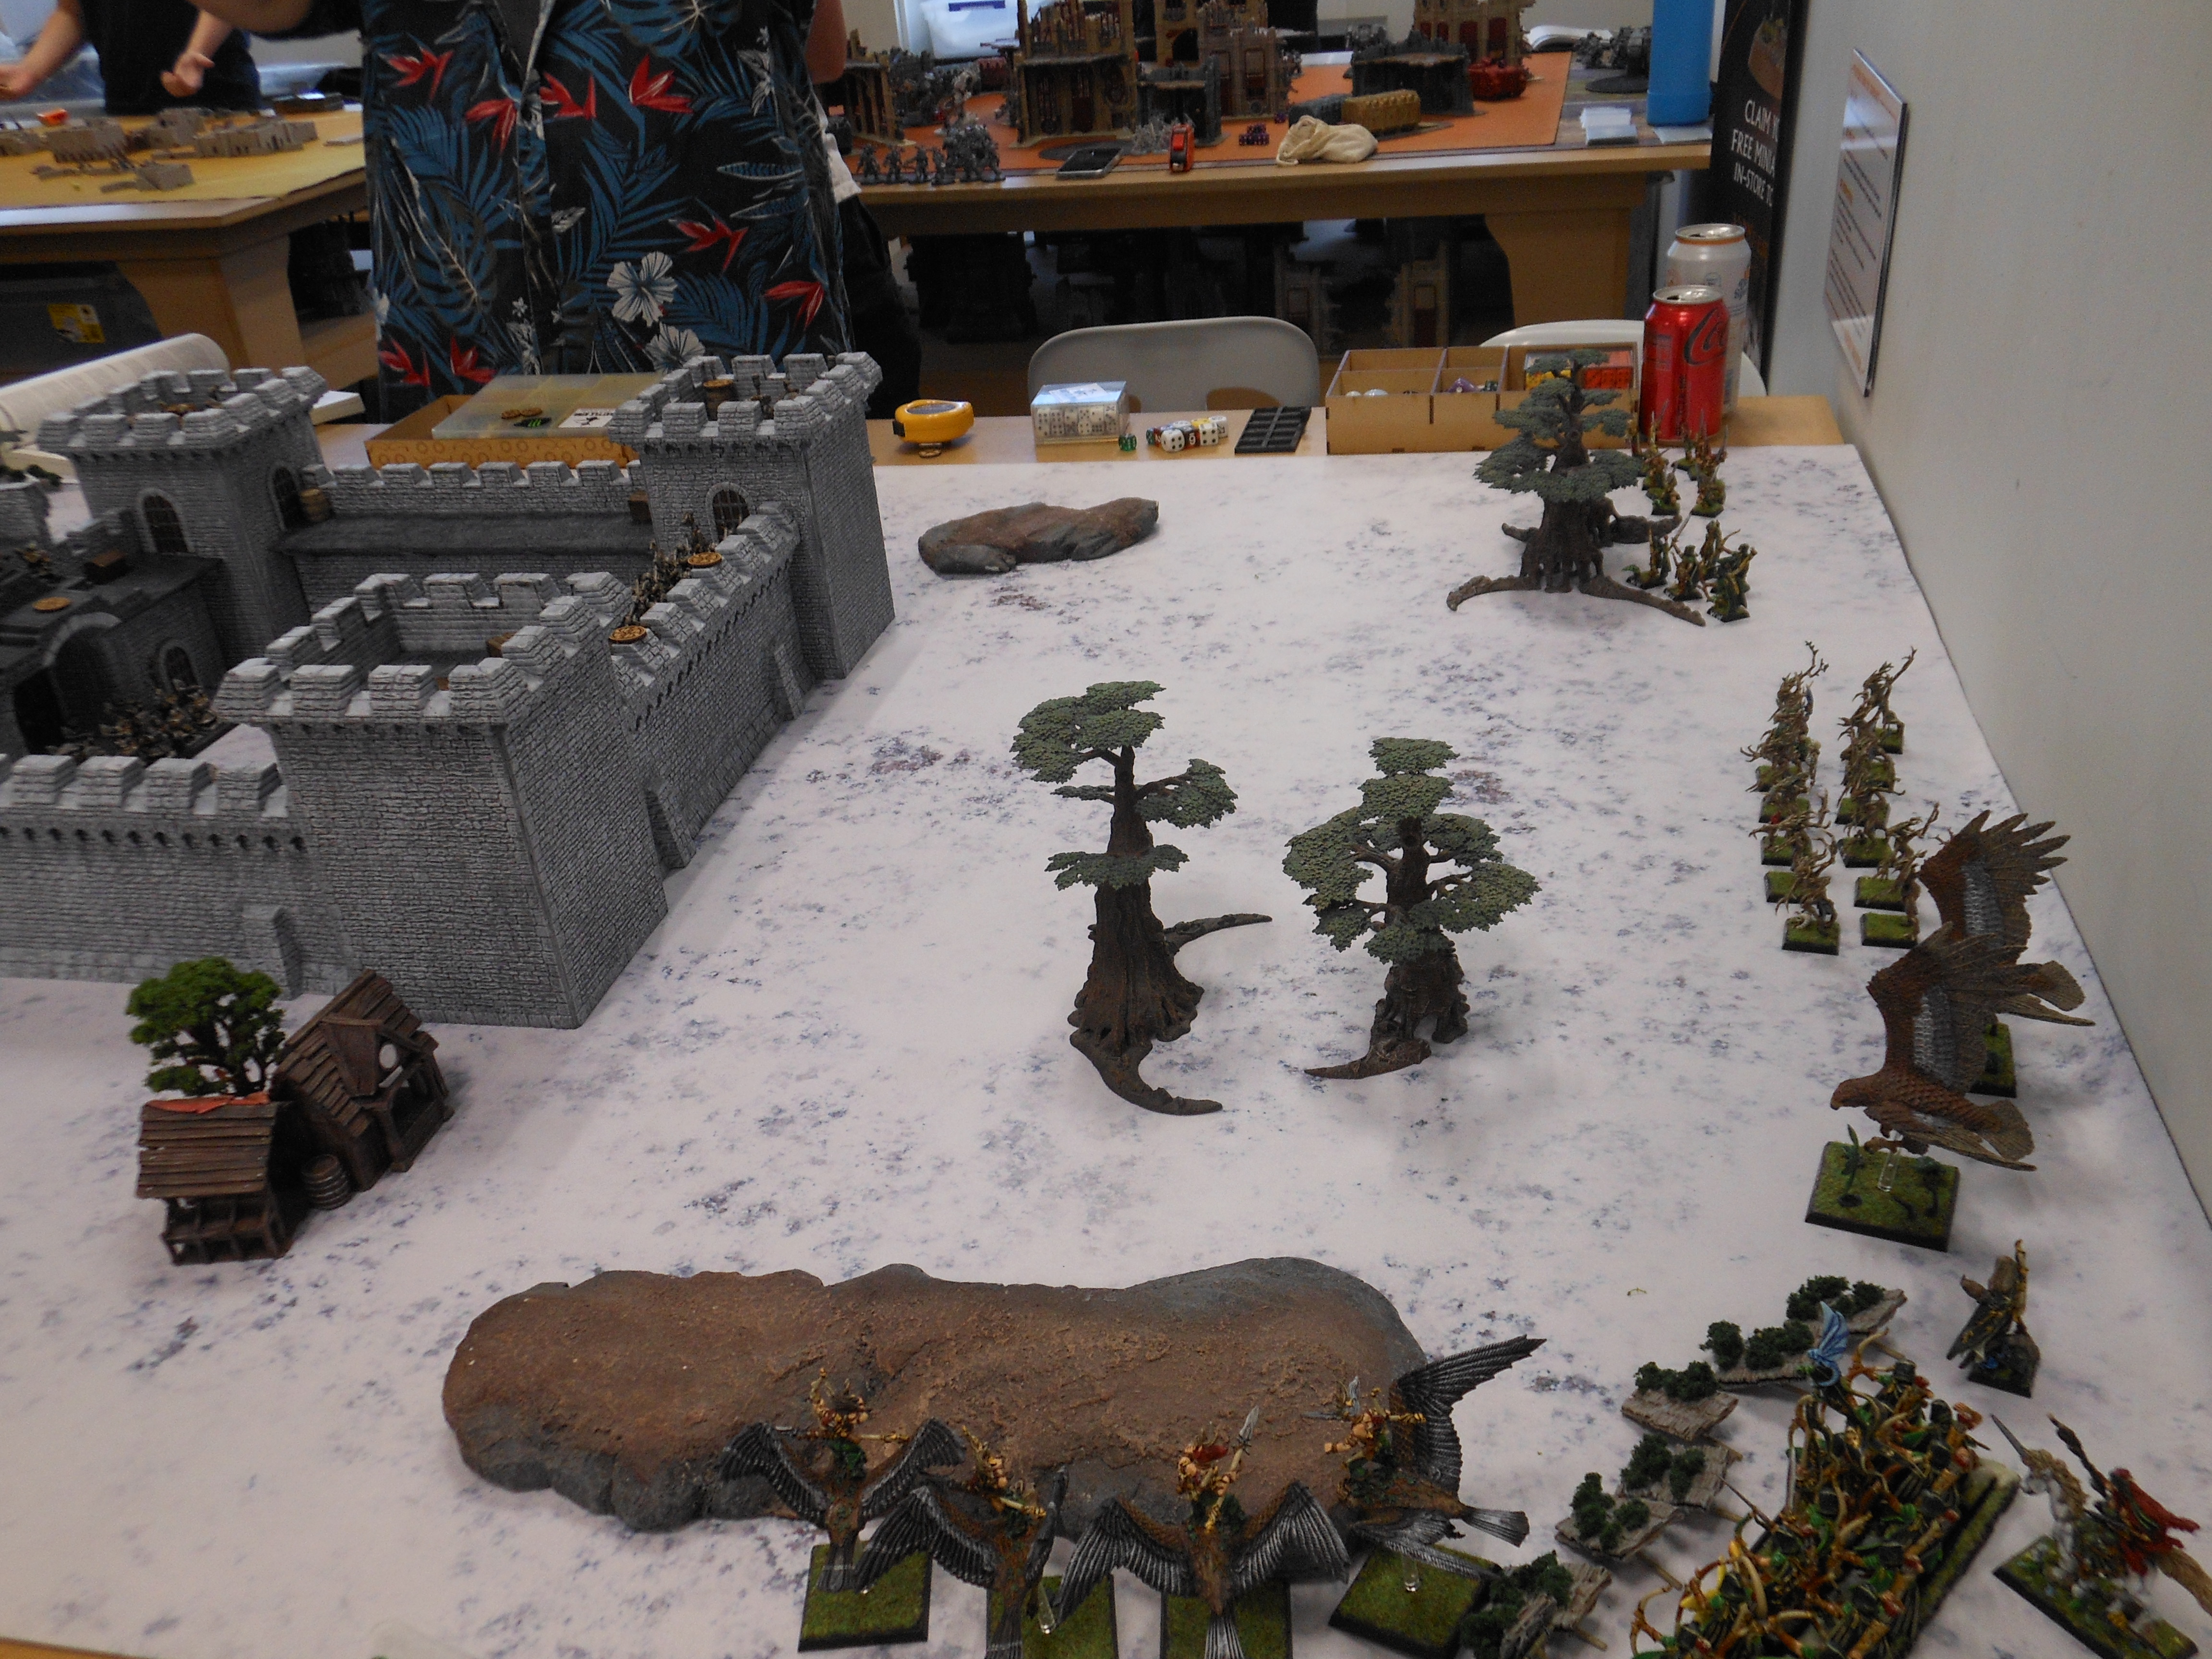 |
| Deployment at the rear of the castle |
The Dwarfs set up with one unit of Thunderers manning the gatehouse, one unit of Thunderers and one unit of Warriors on the rear wall and cannons on top of the two front towers and the rear right tower. The Dwarf Lord takes up a place in the ranks of the Warriors on the rear wall. The final unit of Warriors is kept in the courtyard as a reserve force.
 |
| Man the walls! |
With deployment complete, it was time for me to roll some spells for my mages. My usual plan with my Wood Elves is for my mages to act as medics with healing spells, and this time will be no exception as I want to make as much use of Ariel's Blessing as possible to keep my fragile Wood Elves alive in the face of Dwarf firepower. What this means right now is that I want to get Ariel's Blessing on at least one of my two spellcasters if at all possible.
In the end I manage just that. Aneaeth ends up bringing Ariel's Blessing alongside Fury of The Forest, Call of The Hunt and Tree Singing. In a very rare instance, I end up with Call of The Hunt twice, as Ailyn rolls it as well along with Tree Singing.
And then the battle began in earnest.
Dwarf Turn 1
As the defenders of the castle the Dwarfs start the first turn. Their opening movement phase is tame, with the Dwarfs on the walls adopting skirmish mode and shuffling around the ramparts a little bit.
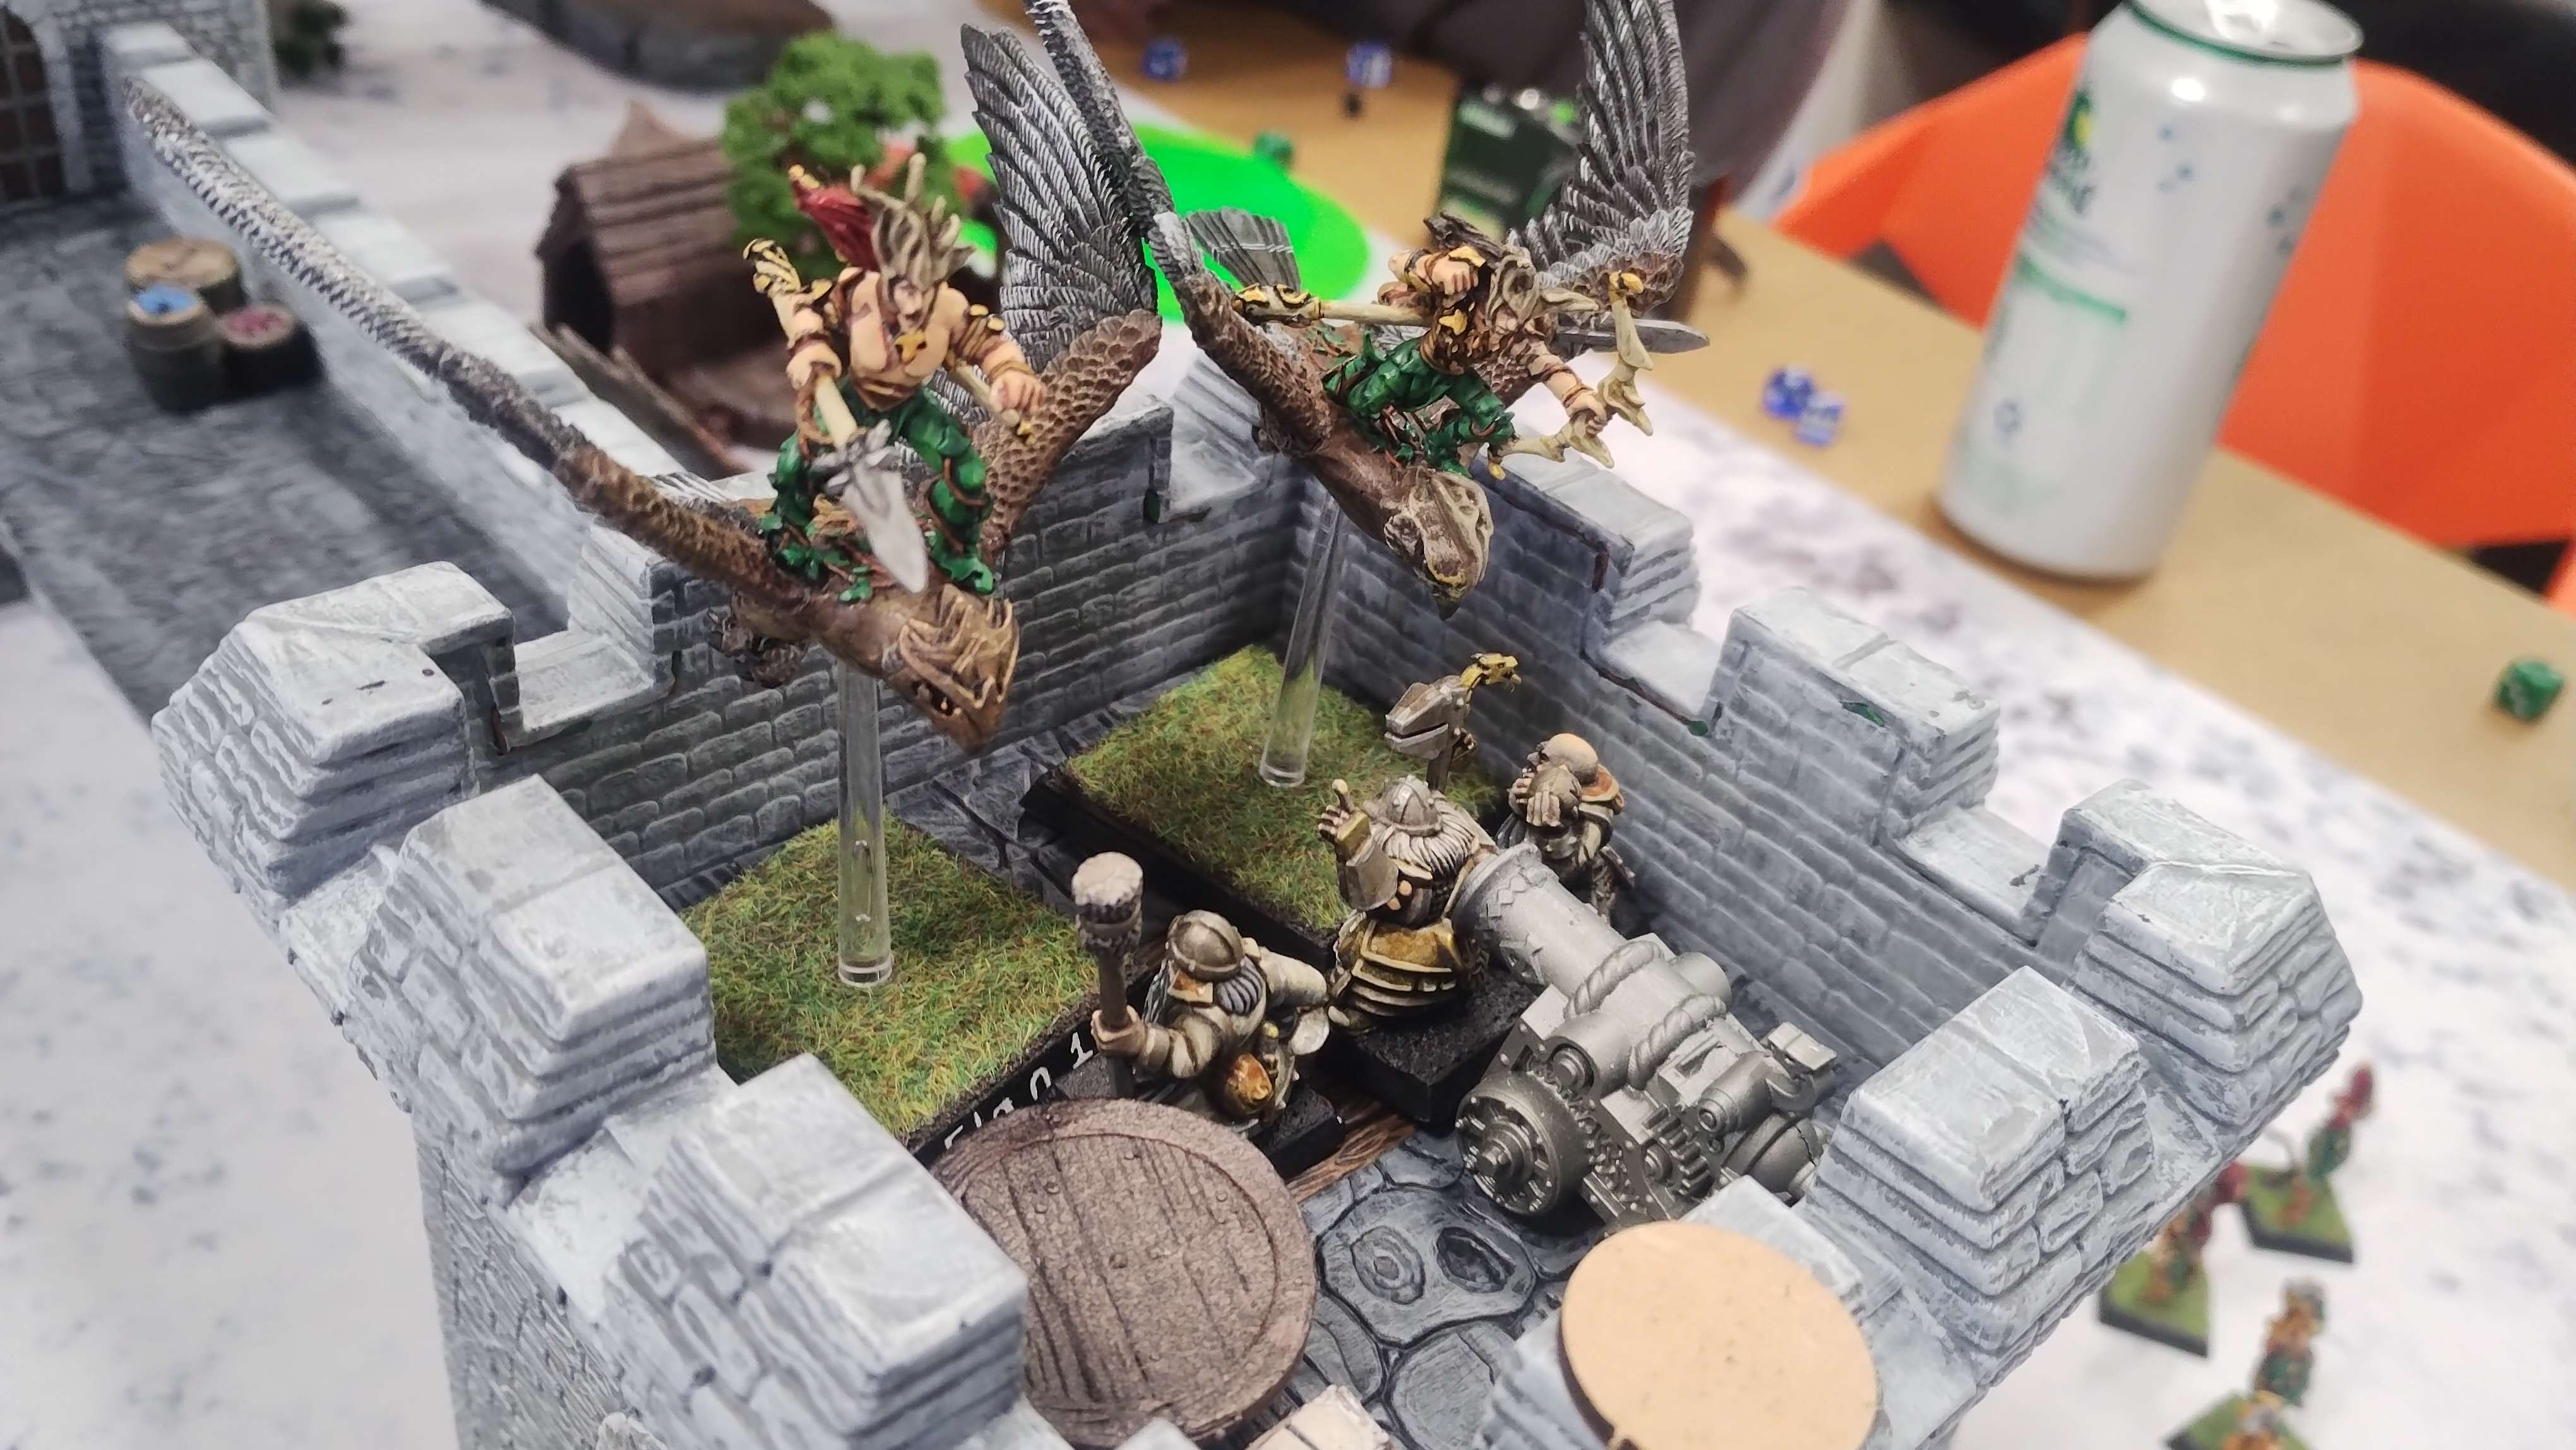
The Dwarf shooting phase is much more lively. Both the cannons on the front towers spring into action and line up a bead on the Eternal Guard. The front left cannon fires first, the shot bouncing into the Eternal Guard and hitting bang smack into Gaerielle, knocking her out of the fight. The front right cannon falls further short, and only manages a single casualty on the Eternal Guard with its bounce.
Not to be outdone, the rear cannon fires a shot at Eagles, attempting to strike down both with one bounce. The shot manages to squarely hit Haast, spelling doom for the valliant bird and.....
....... rolls a 1 to wound.
Following the cannons comes the Thunderers. The gatehouse Thunderers fire a volley at the Eternal Guard bearing down on them, inflicting two casualties. Their counterparts on the rear wall fare far more poorly, failing to land any wounds on the Dryads they took aim at.
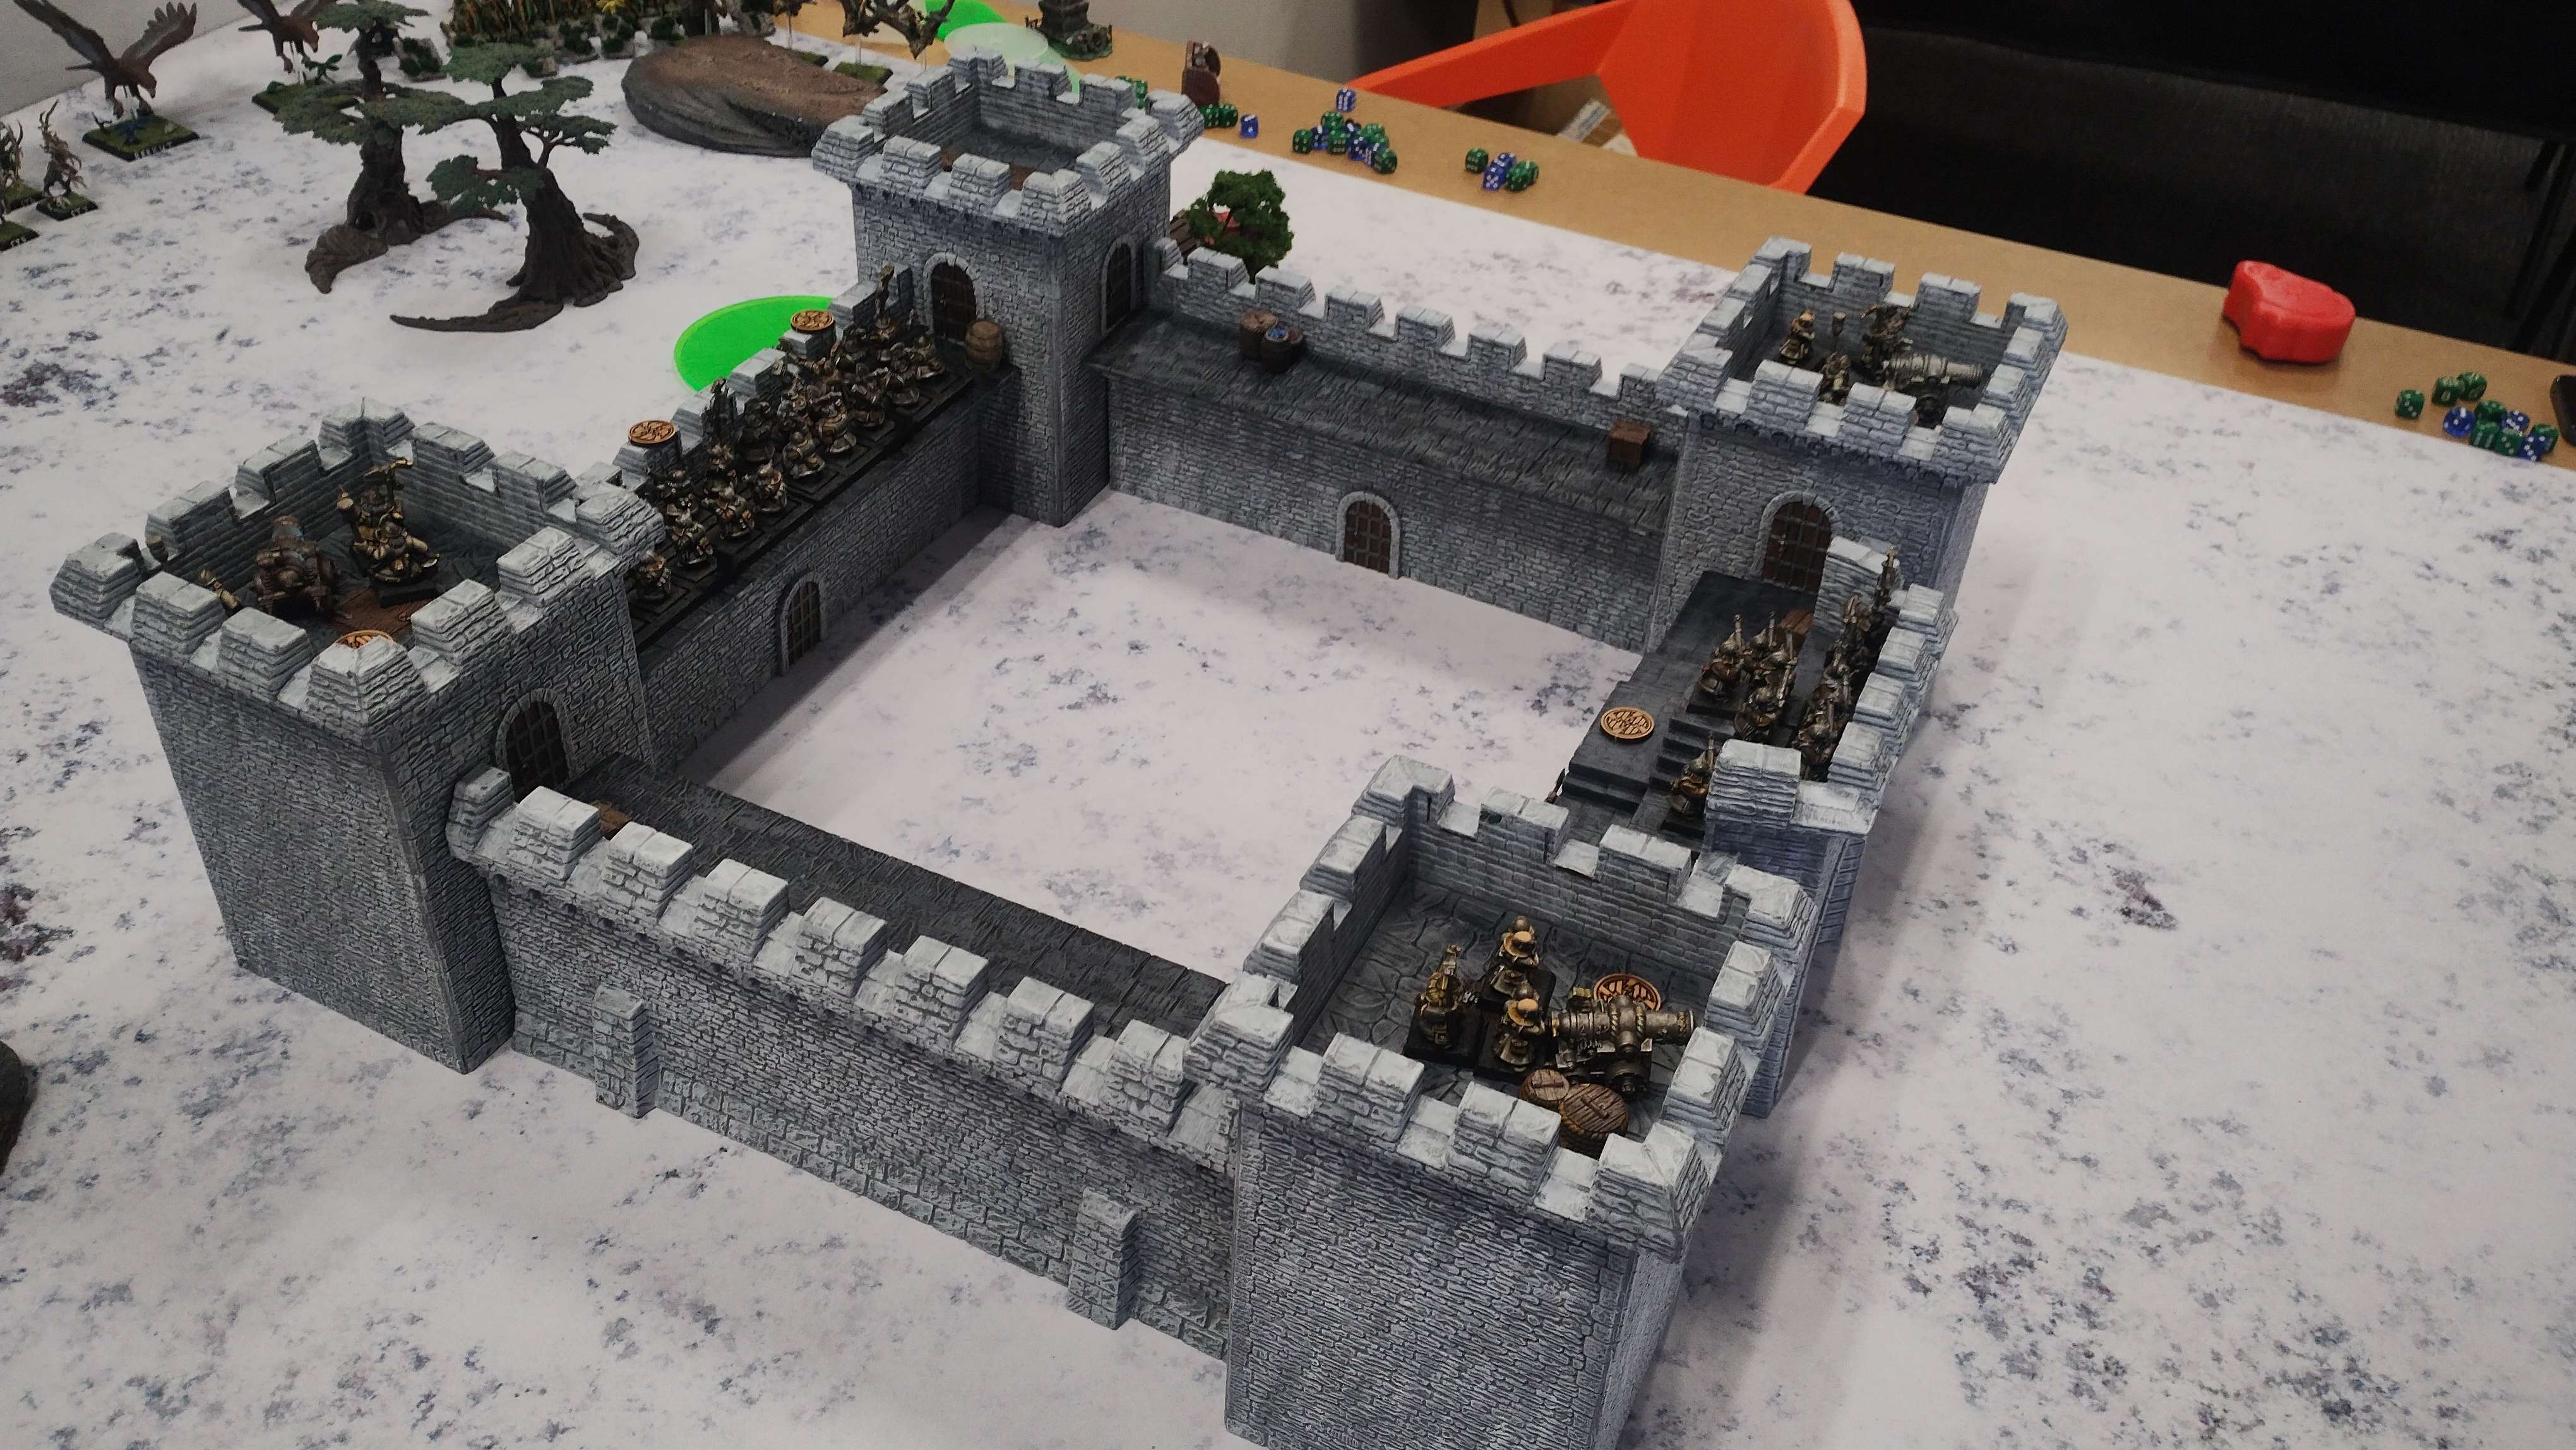
 |
| The Thunderers guarding the gatehouse brace themselves for what is to come |
Wood Elf Turn 1
Well, that went alright all things considered. Losing one of my characters - and the noble I was expecting to spearhead the gate attack with no less - right off the gate isn't ideal, but that shooting certainly could have gone a lot worse for me. And both the sides of the castle are still undefended, if I can just reach them with my Wardancers my plan will be back on track and I should be able to still seize the castle.
But that won't happen unless I actually get close to the castle, so my own movement phase consists primarily of every unit converging on the castle in one way or another. The Wardancer units both make a beeline for their respective sides of the castle, while the Eagles begin to fly over to the left side of the castle to get out of the rear cannon's arc of fire - I'm now very nervous about them getting knocked out when I need them for supporting my attacks on the walls. The Warhawk Riders similarly glide over to the left side with an eye towards charging the front left cannon to take some of the heat off my Eternal Guard, who themselves continue marching straight up to the castle, as do the Dryads on the opposite side of the battlefield.
 |
| The Warhawk Riders soar towards the castle |
The Scouts shift around to the right side of the castle with an eye towards backing up the Dark Passion Play when they scale the right wall. Finally the Glade Guard move forward as best they can to get into short range of the ramparts.
A combination of my usual spell dice and some good Dwarf dispels means I only manage to cast one spell in the magic phase, but it is fortunately the one I wanted most - Ariel's Blessing on the Eternal Guard.
My shooting phase starts out dramatically with Moniqeth loosing the Hail of Doom Arrow on the Thunderers in the gatehouse, landing 8 hits and downing 3 Dwarfs when the dust clears. This proves to be the high water mark of my shooting, as the Glade Guard at the front of the castle try to land hits on the cannons in the towers and fail to land a single wound on any of the crewmen. Their compatriots behind the castle try their luck with the Warriors on the rear wall, reasoning them to be an easier target and looking to soften them up ahead of the Dryads assaulting the walls, but fail to land any hits let alone wounds. The Scouts send an opportunistic volley into the rear cannon, and miss entirely, as does the Wishmaster when he too tries to pick off a few of the Warriors on the rear wall. The only other bright spot is the Warhawk Riders, who manage to both hit and land a wound on one of the front left cannon crew who...
... rolls a 6 on his armour save. Wonderful.
 |
| The end of Turn 1 |
 |
| End of Turn 1 from the rear |
Dwarf Turn 2
Most of the Dwarfs stay firmly planted where they are on the walls. The sole exception is the Warriors in the courtyard, who make a decision to commit to the left wall and begin to make their way there.
 |
| Lightning flashes overhead as the battle is joined |
The Dwarf shooting phase begins with the rear cannon taking a shot at the Eagles, trying again to bring down two birds with one stone cannonball. Between bounces it manages to hit both Eagles, and knocks Haast out of the sky, and then...
.... rolls a 1 to wound Berkut.
The cannons at the front of the castle fare even worse. The front right cannon fires again at the Eternal Guard but overshoots them completely. The front left cannon swings around and takes a shot at the fast-closing Warhawk Riders and Misfires! When the dust settles the Misfire result is, fortunately for the Dwarfs, only a 6.
The rear Thunderers try to pick up the slack and fire a volley at Berkut, aiming to succeed where their cannoneer comrades failed. They very nearly manage just that, leaving the noble raptor on just one wound. The gatehouse Thunderers pour another salvo into the Eternal Guard, but of the four hits they manage only two land wounds and one of those is regenerated by Ariel's Blessing.
 |
| The end of the Dwarf Turn 2 |
Wood Elf Turn 2
Well losing one of the Eagles and their crucial mobile support is not ideal, and neither is having the other on his last legs, but this is still far from over. Both the side walls are still completely undefended, and if I can get some Wardancers onto them uncontested they can cause some serious havoc. My Eternal Guard are also fairly intact, and if I can get them through the castle gate I'll have a good chance at securing the courtyard by the end.
Those cannons are starting to cause me a great deal of concern though, and really need to go sooner rather than later. To that end the first Charge of the game sees the Warhawk Riders swoop down onto the front left Cannon, only to get a face full of molten lead for their troubles. The rest of the Wood Elves continue to converge on the castle as best they can.
 |
| The Warhawk Riders swoop down upon a Dwarf cannon crew |
The magic phase sees the Dwarfs dispel Aneaeth's attempt to recast Ariel's Blessing, but in the process they use up all their dispel dice and are thus unable to intervene when Ailyn succeeds in casting Call of The Hunt on the Dryads, sending them careening up the rear wall and into combat with the Thunderers on top of it. The rest of the Magic Phase is rounded off with some light Treesinging.
 |
| Dryads surge towards the rear of the castle |
The Wood Elf shooting is largely a repeat of the first turn, with the Spirit of Spring managing to pick off three Warriors from the rear wall while the Scouts' opportunistic pot shots at the rear cannon fail to land any wounds. The Glade Guard at the front of the castle both concentrate on the gatehouse Thunderers, reckoning them an easier target than the artillery crewmen, but either miss completely or fail to land any wounds.
 |
| The Wood Elves bring forth the battering ram |
But it will all be OK as long as I can just get rid of at least one cannon crew, and I have my Warhawks in combat with one! Alas, what might have otherwise been ideal prey for the Warhawk Riders proves much more formidable with a set of castle battlements in front of them. Defending ramparts means that the Dwarfs get to swing first despite being charged, and the Engineer with the front left Cannon crew manages to finish off two of the Warhawk Riders that had been injured by the boiling oil. The remaining Warhawks fail to land any hits, and promptly break and Flee.
 |
| The Dwarf gunners fight valiantly |
The Dryads fare little better, failing to inflict any casualties against the Thunderers on the rear wall and taking a couple of losses in return. They do however prove to be made of sterner stuff than their Elf counterparts when they pass their Break Test and remain locked in combat.
 |
| The Spellsinger Ailyn bolsters the rear attack force |
 |
| The start of Turn 3 |
Dwarf Turn 3
The Dwarf turn begins with what ends up being the only Charge the Dwarfs will ever make the entire game, as the Warriors on the rear wall pile into the combat unfolding on the ramparts next to them. Their brethren in the courtyard also make it to the left wall and ascend to the battlements there.
The Dwarf shooting phase this turn starts not with a bang but with a whimper. First the rear cannon attempts to target the Scouts close by and Misfires, rolling a 3 and leaving it infuriatingly still intact but mercifully unable to fire this turn. The Dwarf misfortune continues when the front right Cannon attempts to fire at the Eternal Guard and rolls a second Misfire! After the Engineering runes take effect however it is only a 6, leaving it free to fire next turn. The remaining Cannon takes a shot at the Wardancers closing fast on the left wall and manages to bring down two of them.
The combat on the rear wall sees the Dwarf Lord, his attending Warriors and the Thunderers hack down three Dryads between them for far less than three Dwarfs in return, and this time the Dryads decide to cut their losses and Flee.
 |
| The end of Dwarf Turn 3 |
The violent bellowing roars of cannon fire shattered the song of the wind, following a few paces behind the unnaturally bright flashes that rippled across the darkness above and cast a ghostly sihlouette of the monstrous black cliff of cold stone bricks that stretched into the swirling clouds. At its foot came ten shadows, whirling snaking forms barely visible in the dark of the blizzard, their madly twisting and swirling forms blending seamlessly into the wild path of the snow. One by one they came to hover by the foot of the wall, shifting from one foot to the other, twisting and writhing, taking the tension of a coiled spring as they waited.
"Is all our company here?"
Naestrelle tossed a glance over each of the assembled figures, marking them one by one with her eyes. Though the wind smothered and throttled her lithe athletic figure and washed over her bare skin, she felt only a cool breeze at midsummer. The spiraling tattoos that ran across her flesh shifted and flickered with strange inner colours.
Satisfied, Naestrelle gave a short quick nod. "Yes, all our players are present. You may begin."
A short staccato pattern of drumbeats fluttered through the night at the base of the wall. At once the ten elves bounded and dashed to a line abreast before it. Then the drum began anew, a sinuous elusive rhythm that slowly grew in pace and intensity. As it grew each figure began to grow wilder and more eager in their jumps and pirouettes.
As the drums reached a feverish crescendo, the elves in unison hurled their weapons straight into the air with all their might. As the blades spun upwards above them, each elf fetched a slender silver grappling hook tethered by sturdy vine cord to their waist belt, released some slack with a quick bend of the arm, gave three tremendous swings and gave a tremendous somersault into the air, flinging the hooks towards the distant top of the ramparts high above as they furiously wheeled through the air.
A series of ten sonorous clangs rang out from far above at the precise instant the falling weapons returned to their masters' hands, each effortlessly caught in mid air as the Wardancers began their wild galloping ascent of the dark castle, bounding and spinning and and sprinting up the stones in a web of gravity defying acrobatics.
At the very climax the Dark Passion Play vaulted over the top of the castle ramparts and corkscrewed through the midnight wind to land with a united bow upon the empty top of the wall.
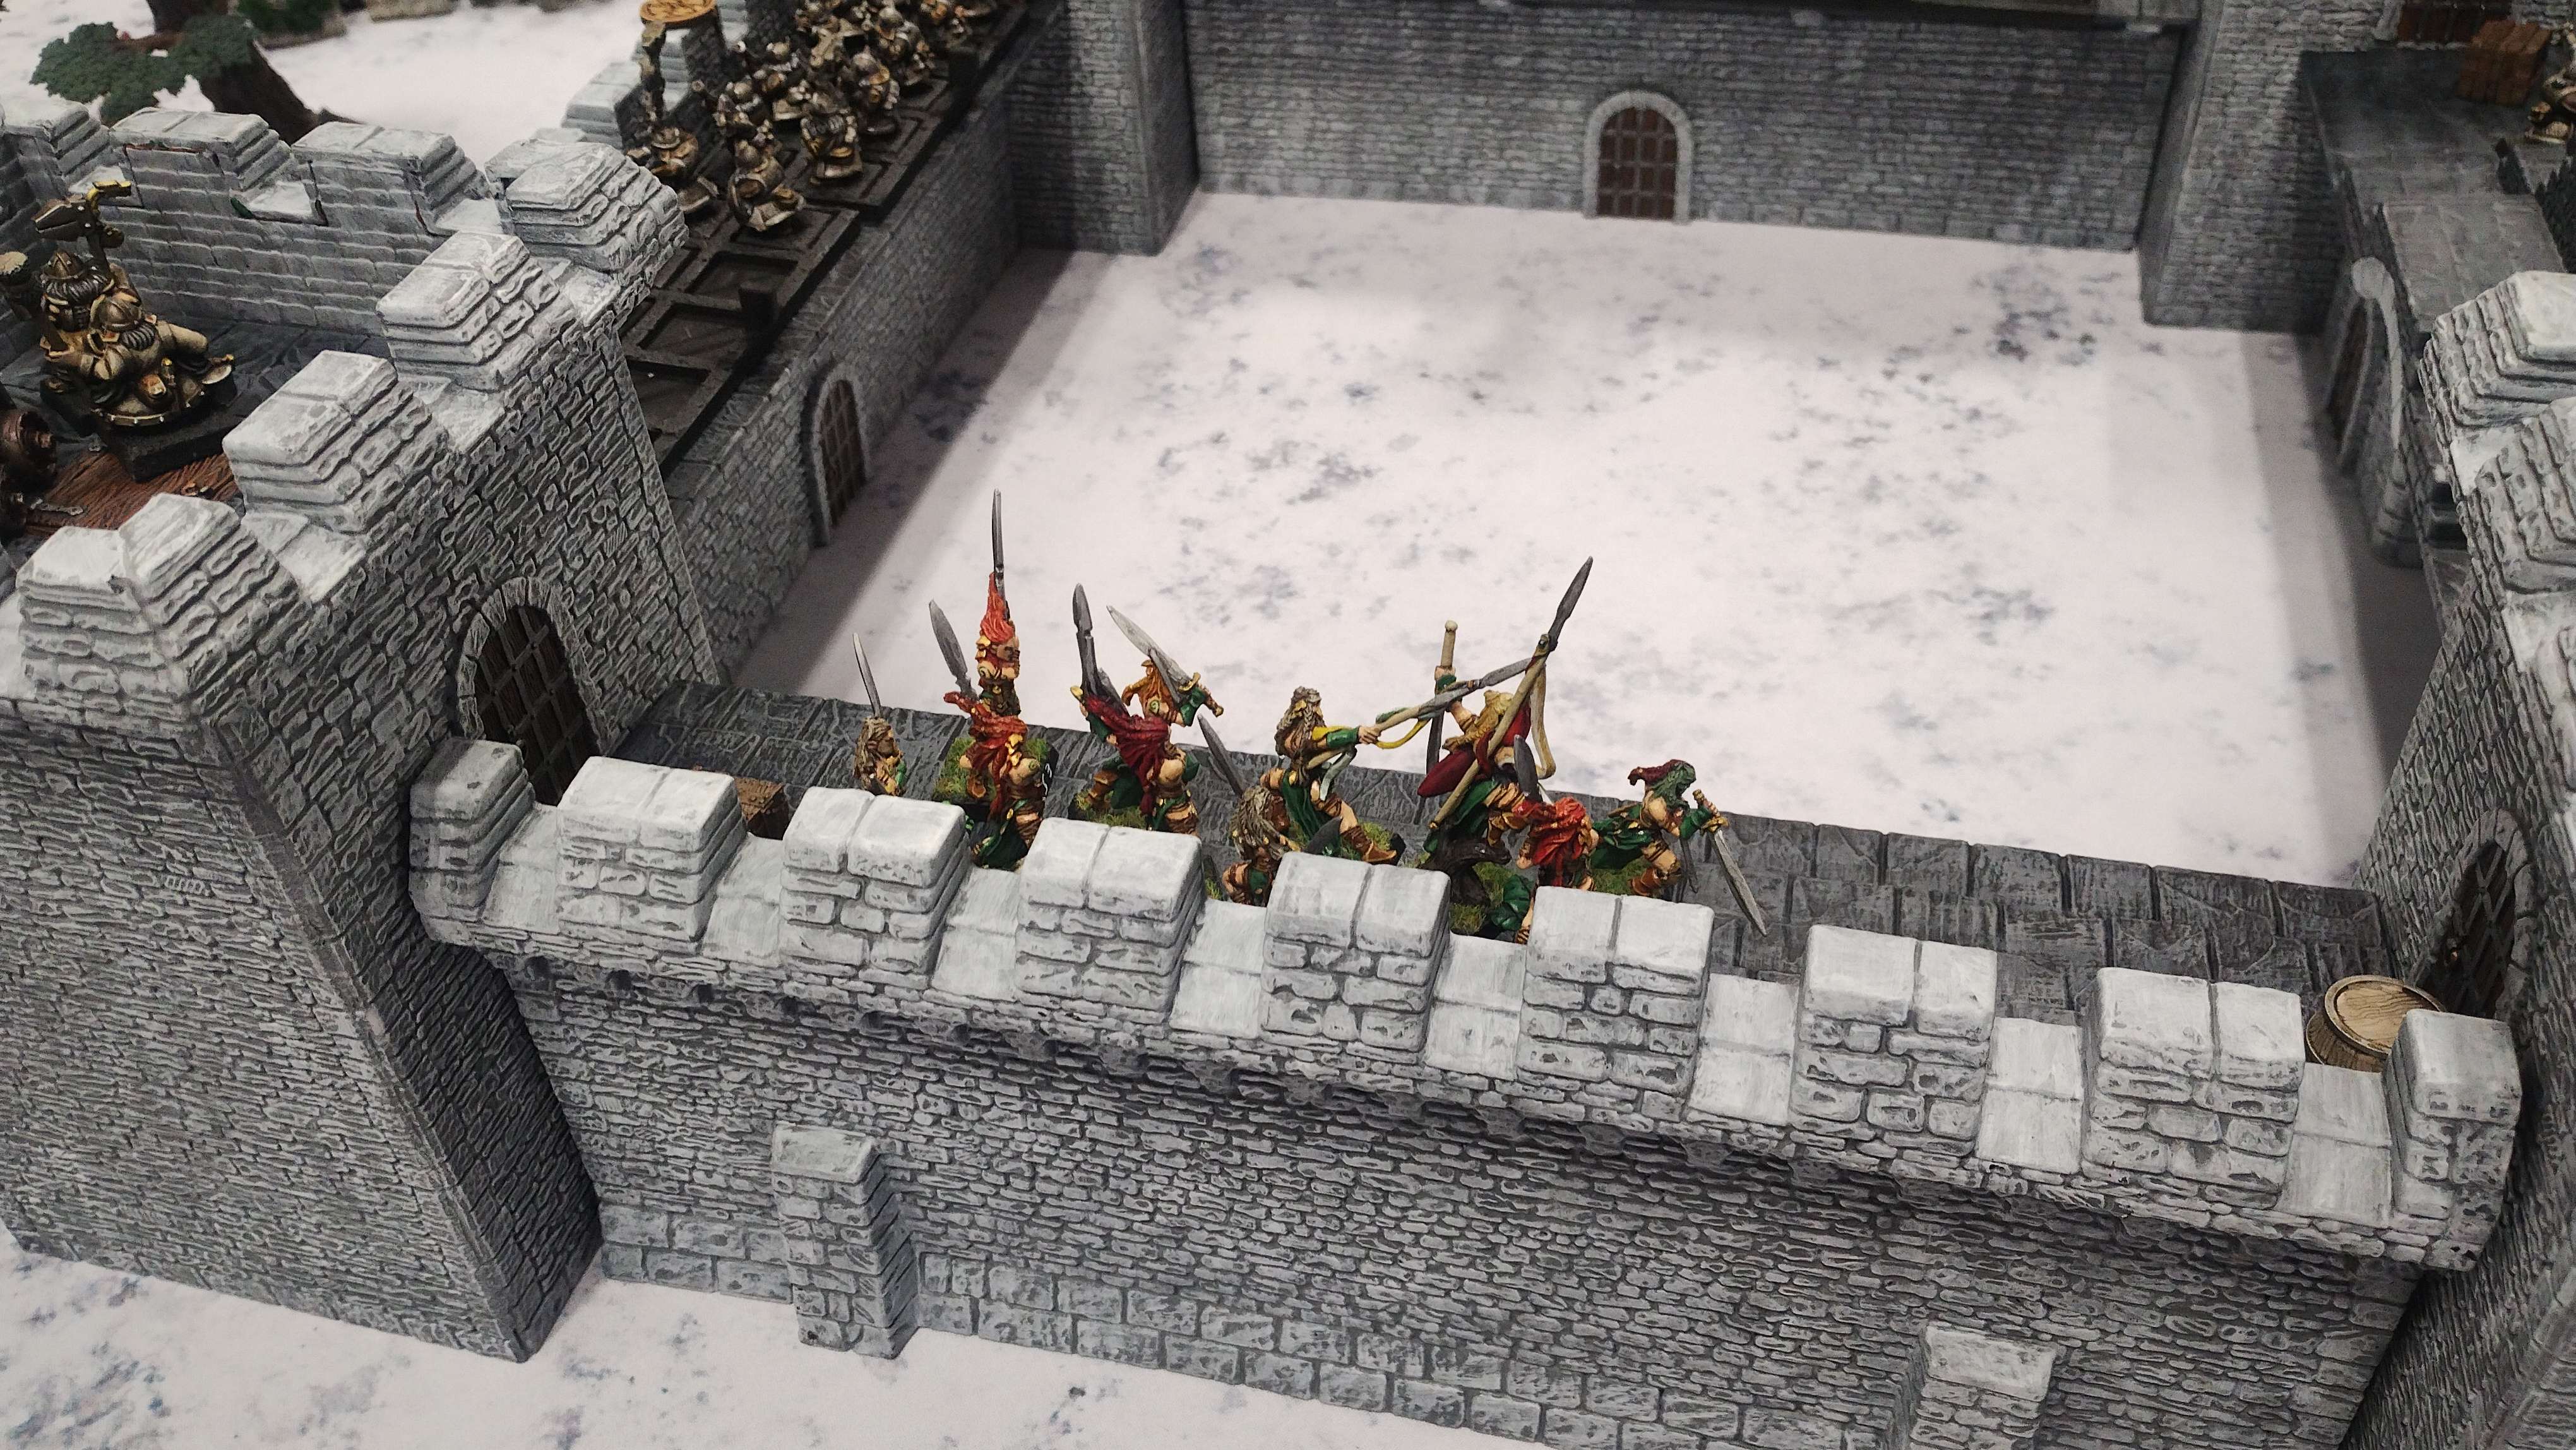 |
| The Wardancers launch a daring sneak attack |
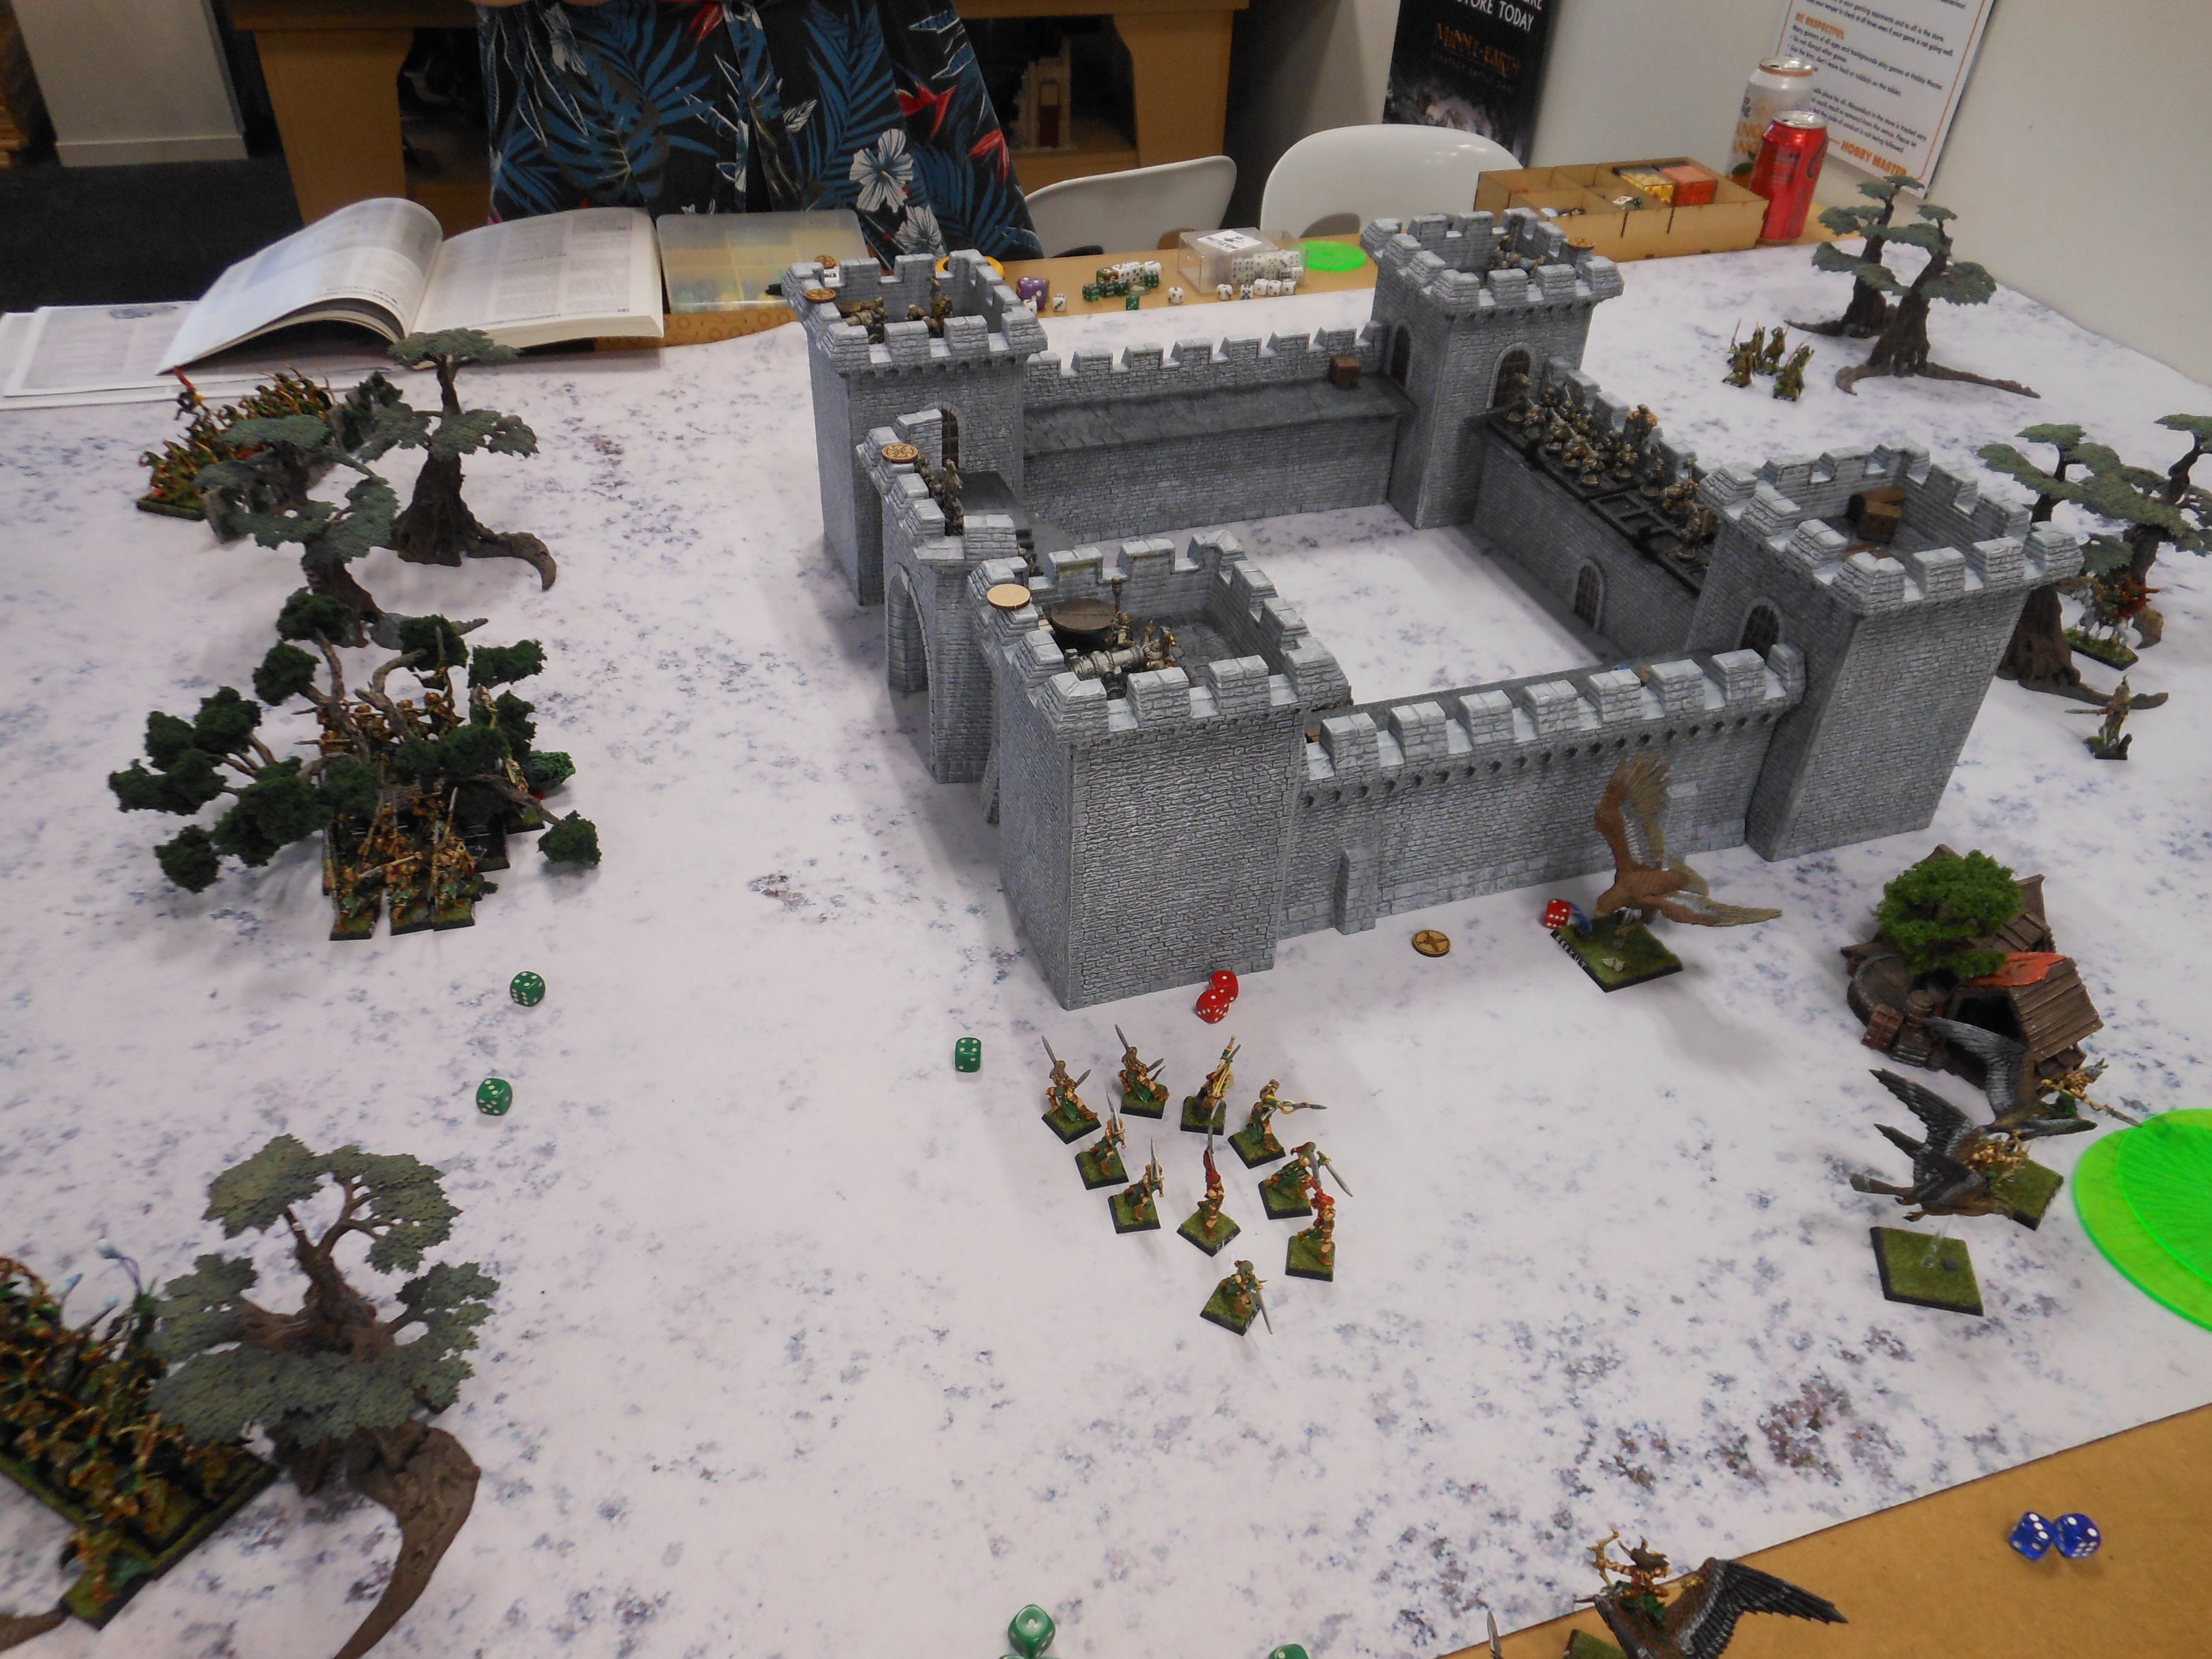
Wood Elf Turn 3
At last, all my main combat elements are close enough to the castle, now is the moment to strike that I have been waiting for! But first, I must see to my fleeing units. The Dryads Rally easily enough and form up not too far from the rear wall. The Warhawk Riders do not, and unceremoniously fly off the table.
 |
| Berkut swoops down on the battlements, eager for revenge on the Dwarfs |
But then my long-awaited three pronged attack is sprung. The Eternal Guard charge the castle gate. The Wardancers on the left charge the Warriors on the left wall, as does Berkut. Their Wardancer comrades on the opposite side then reach the right wall and swiftly scale it onto the battlements. The Scouts also move up to the wall. Everyone else slowly makes their way closer to the castle.
 |
| Battle erupts on the left wall! |
The magic phase is largely a repeat of the turn before. Ailyn manages to send the Dryads back into the fray with Call of The Hunt, while the Dwarfs hold on to their dispel dice to thwart Aneaeth's spellcasting at the front of the castle. In the end this turns out to waste all their dispel dice as my own regular magic luck kicks in and Aneath Miscasts Ariel's Blessing, leading to a premature end of the magic phase.
The shooting phase is much a repeat of previous turns, failing to inflict any casualties at all this time.
The combat phase begins with the Eternal Guard levelling their battering ram at the castle gate and thrusting with all their might. The impact results in a Cracked! damage result on the gate, not bad for a first swing. The rear combat sees another two Dryads cut down for no Dwarf losses, and once again the Dryads break and flee. The combat on the left wall however is much less decisive, with a combination of defended ramparts and 4+ Ward Saves leaving neither side able to inflict any wounds.
Dwarf Turn 4
There is no Dwarf movement this turn, every unit not locked in combat holding its position on the walls.
The shooting phase sees the Dwarfs return to form with a vengeance. The Thunderers on the rear wall fail to accomplish much of anything, and the rear cannon crew drops a pot full of boiling lead on the Scouts in the shadow of the tower, who only narrowly avoid the splash. The Dwarfs at the front of the castle are another matter entirely however. First the front right cannon fires a blast of grapeshot into the Wardancers on the right wall and brings down four of them. Then the gatehouse Thunderers and front left cannon unleash hell upon the Eternal Guard. Between the boiling lead, grapeshot and handgun bullets only the Eternal Guardian and Moniqeth survive unscathed, and somehow manage to pass the resulting Panic test.
The combat on the left wall then sees the Wardancers fail to land any wounds despite striking first, before the Warriors they are fighting finish off Berkut and two Wardancers, though the elves are still stubborn enough to just narrowly pass the resulting break test and remain in combat.
Wood Elf Turn 4
It is at this point that I begin to suspect I won't be capturing the castle after all, but I'm still not totally gone just yet. I still have one unit of Wardancers on the walls uncontested and free to begin fighting the Dwarfs from behind the ramparts. I also still have a mass of Glade Guard. If I can just get those archers into the Courtyard by the end of the game, I might still be able to seize the castle out from under the Dwarfs. Since none of the Glade Guard are carrying ladders, this means the only chance of that happening is through the castle gates, so one way or another I have to get those gates open.
So begins my last final winner takes all gambit. First Moniqeth and the lone surviving Eternal Guardian abandon the battering ram and withdraw into the shadow of the front left tower. In their place rush in Summer Lightning, who march with all their might and just manage to reach the ram and recover it, though they are in no position to make use of it just yet. Following close behind comes Forever Autumn, getting ready to move into the courtyard once the way is free. At the same time, the surviving Wardancers on the right wall dash into the undefended interior of the front right tower. Not only does this keep them safe from more cannon fire, but it also puts them in a position to attack the gatehouse Thunderers - with any luck, they will be able to capture the gatehouse and open the gates themselves if the Glade Guard fail to batter through them.
 |
| The Glade Guard rush to the aid of their friends and take up the battering ram |
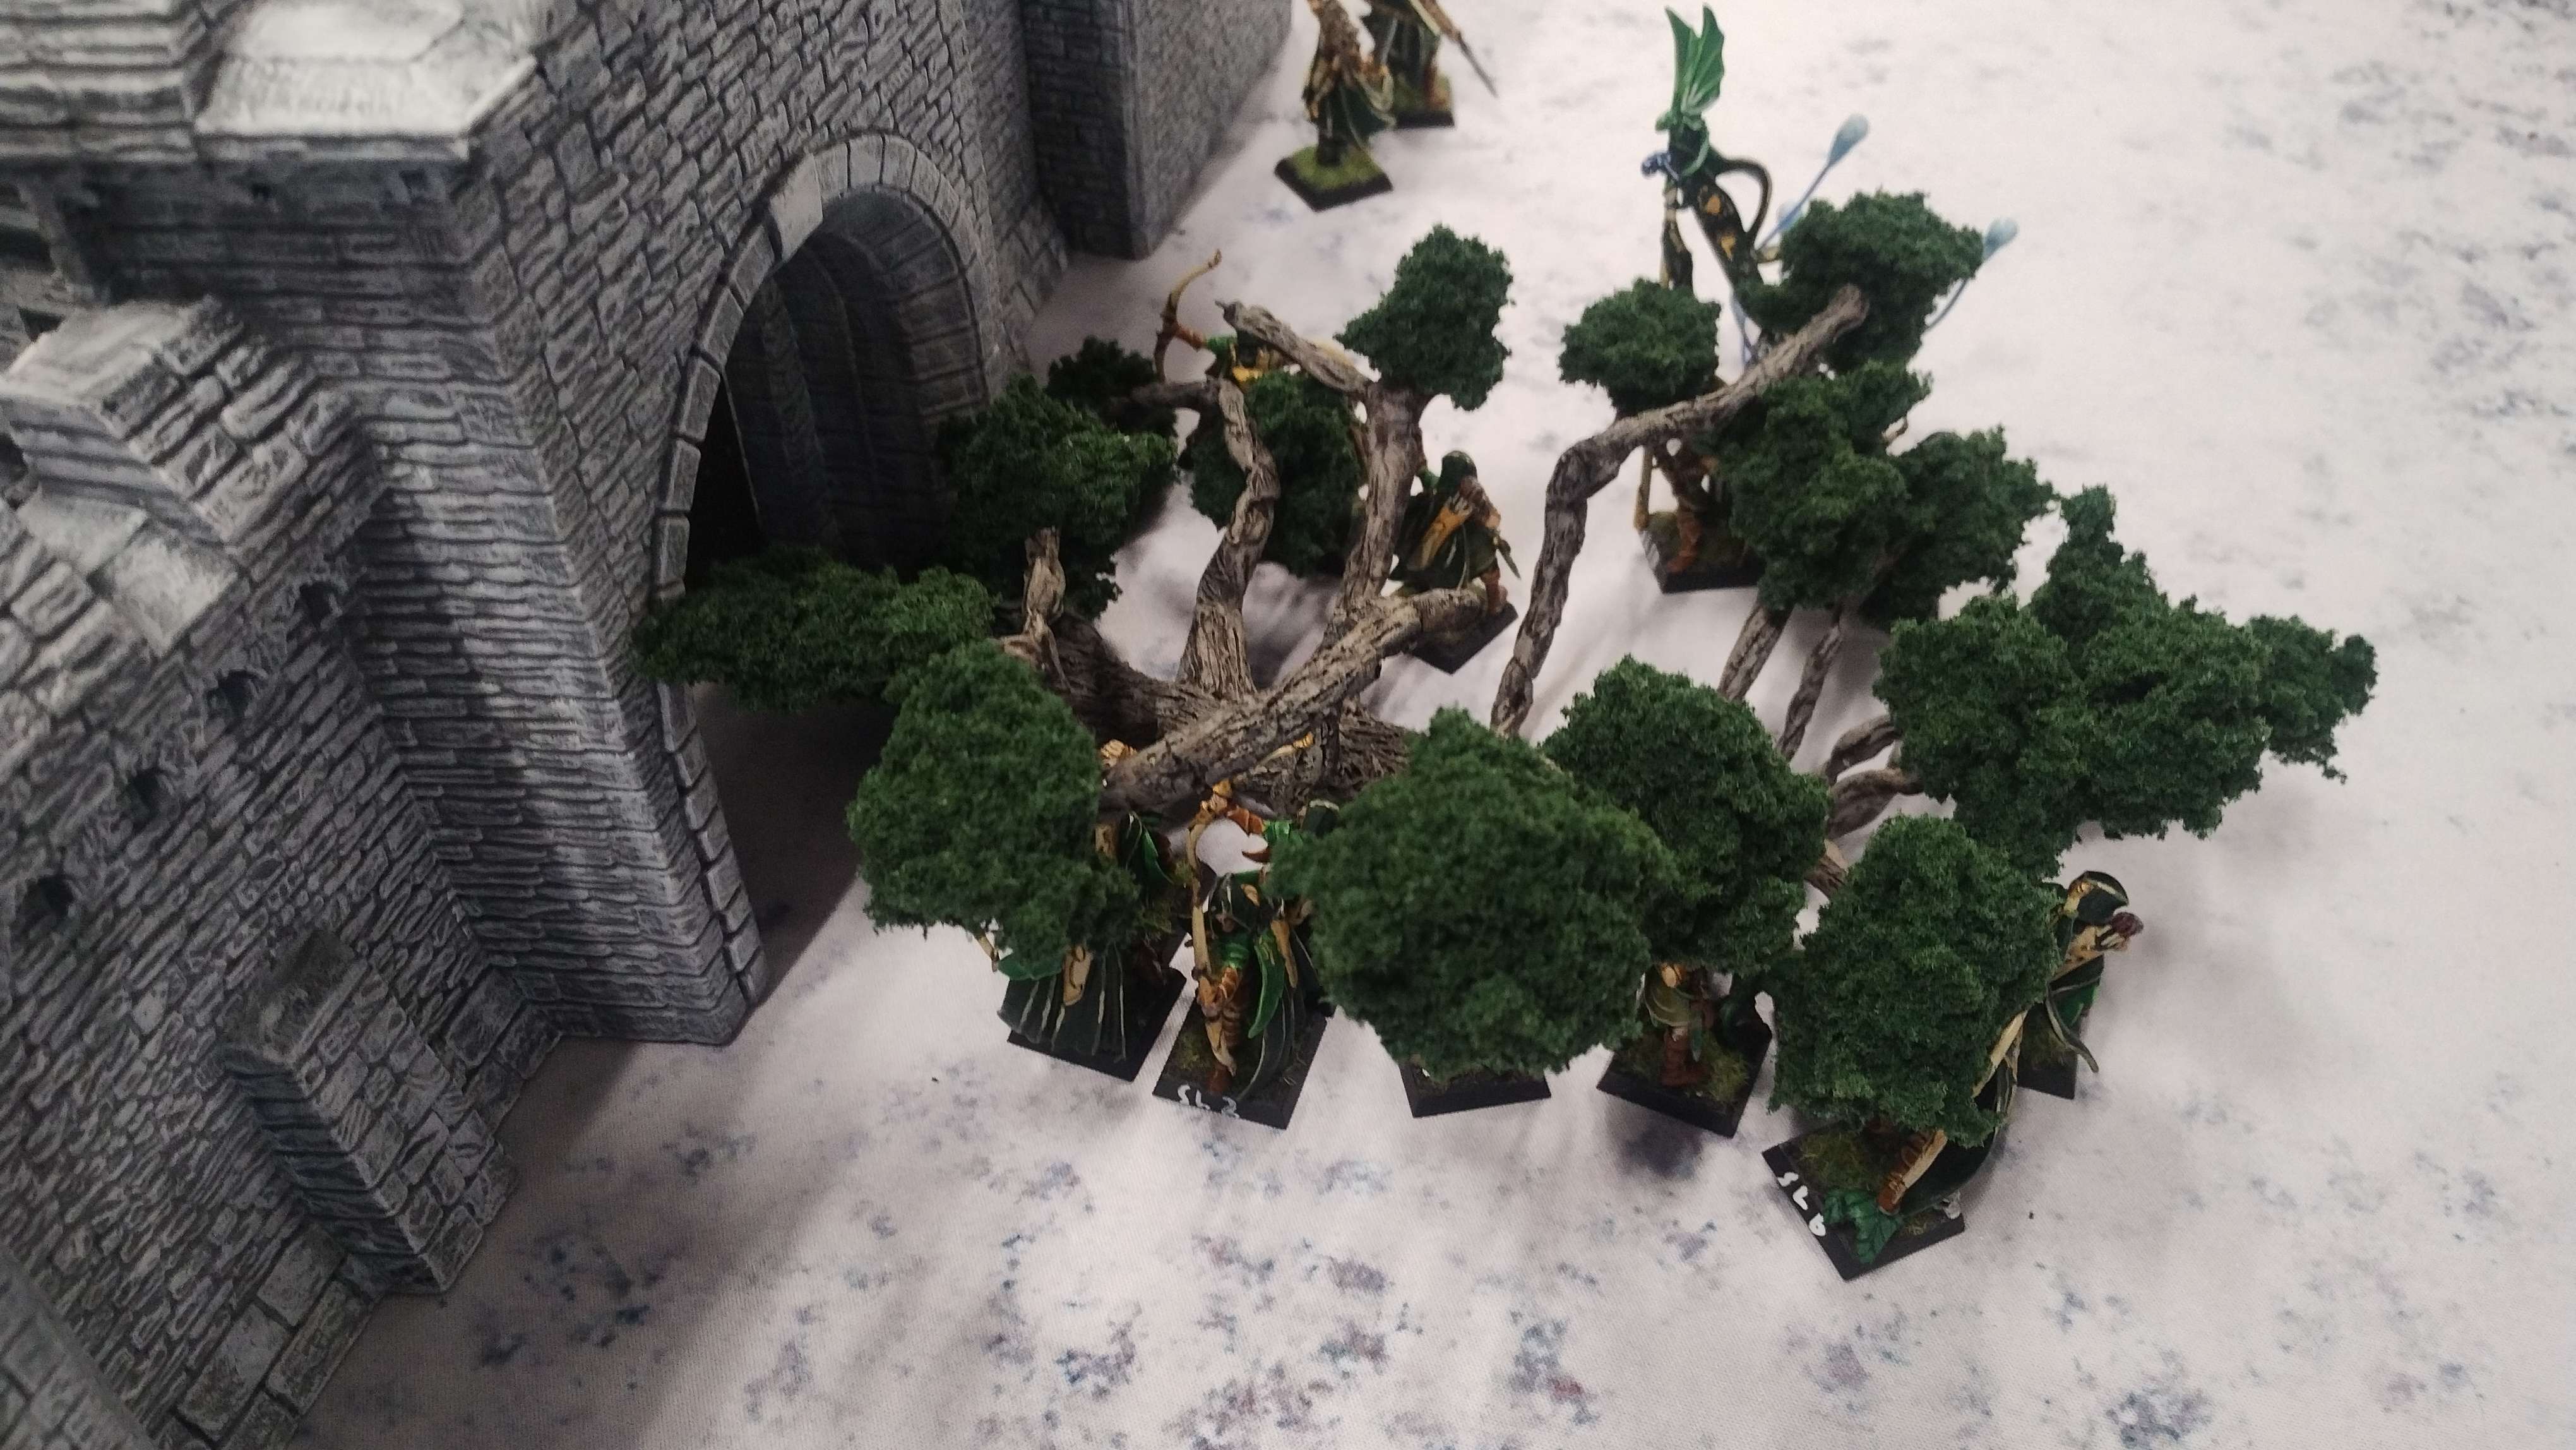
Meanwhile, the Dryads rally a short distance from the rear wall, and the Scouts reach the right wall and ascend it. Everyone else who can do so makes their way to the gatehouse with all possible haste, except for the fighters at the rear of the castle who simply close in as best they can.
In the magic phase the Dwarfs do not make the same mistake twice and concentrate on dispelling Call of The Hunt from Ailyn, which they do, while Aneaeth manages to slip Ariel's Blessing through onto Summer Lightning.
The shooting phase sees Forever Autumn managing to finally inflict some damage, managing to pick off one of the gatehouse Thunderers. Not to be outdone, the Spirit of Spring also mange to bring down a single Dwarf Warrior on the rear wall.
The single combat of the turn finally sees an end to the fighting on the left wall, as the Wardancers fail to land any wounds and take another casualty for their troubles. This proves to be the straw that breaks the camel's back, and they break and flee.
Motes of dust swirled in the air as they tumbled down from the wooden ceiling that quaked and rocked with each blast of gunfire. Insulated from the wind and the cold by the thick stone walls, the interior of the tower was worlds away from the howling blizzard and raging battle outside, an oasis of silent tranquility and warm torchlight that radiated across the furniture, barrels and crates scattered across the room. The only sign of the carnage outside was the frequent bursts of nasty cursing and laughter that carried down from the tower's rooftop. The only witness to the conclave of six tall athletic shadows that shifted and pivoted as they waited by an honestly-wrought door of red-orange wood and grey steel.
"I heard much strife coming from the battlements on the far side," said Larendel, "It may be that the Empty Spiral fail to reach the summit."
"We ought consider that it is us alone that make the climb," added Malaron.
"Then we must conquer the mountain ourselves!" said Bethwynn, ever the fierce one, "Let us start with the ones above us manning their dire cannon. They claimed far too many of our players, they must be taught a lesson. I hunger for vengeance."
Naestrelle cocked her head towards the ceiling, then back towards the way from whence they came, then towards the door they were not beside. Then finally she tossed a glance over the rest of her party.
"Our path now forks," The Bladesinger began, "And which path to take is the eternal question. Malaron is right, at this hour it is we alone who command the stage, and all wait with hushed breath to see the next act. Yet we shadows are but one passing act of many in this tale. Let us press onwards, not back, through the open door that we might cast open the gates for all the players to appear. For that is how we will make our mark the brightest in this story."
"Forwards," said Larendel in agreement.
"Forwards," said Malaron.
"Forwards."
"Forwards."
"Forwards."
The Wardancers nodded in agreement, and with a unanimous hushed breath and sudden fluttering drumbeat, threw open the door and leapt out into their destiny beyond...
 |
| The end of Turn 4 |
Turn 5
Again the Dwarfs stay firmly in place, bracing for more attacks once the fleeing Wood Elf forces rally.
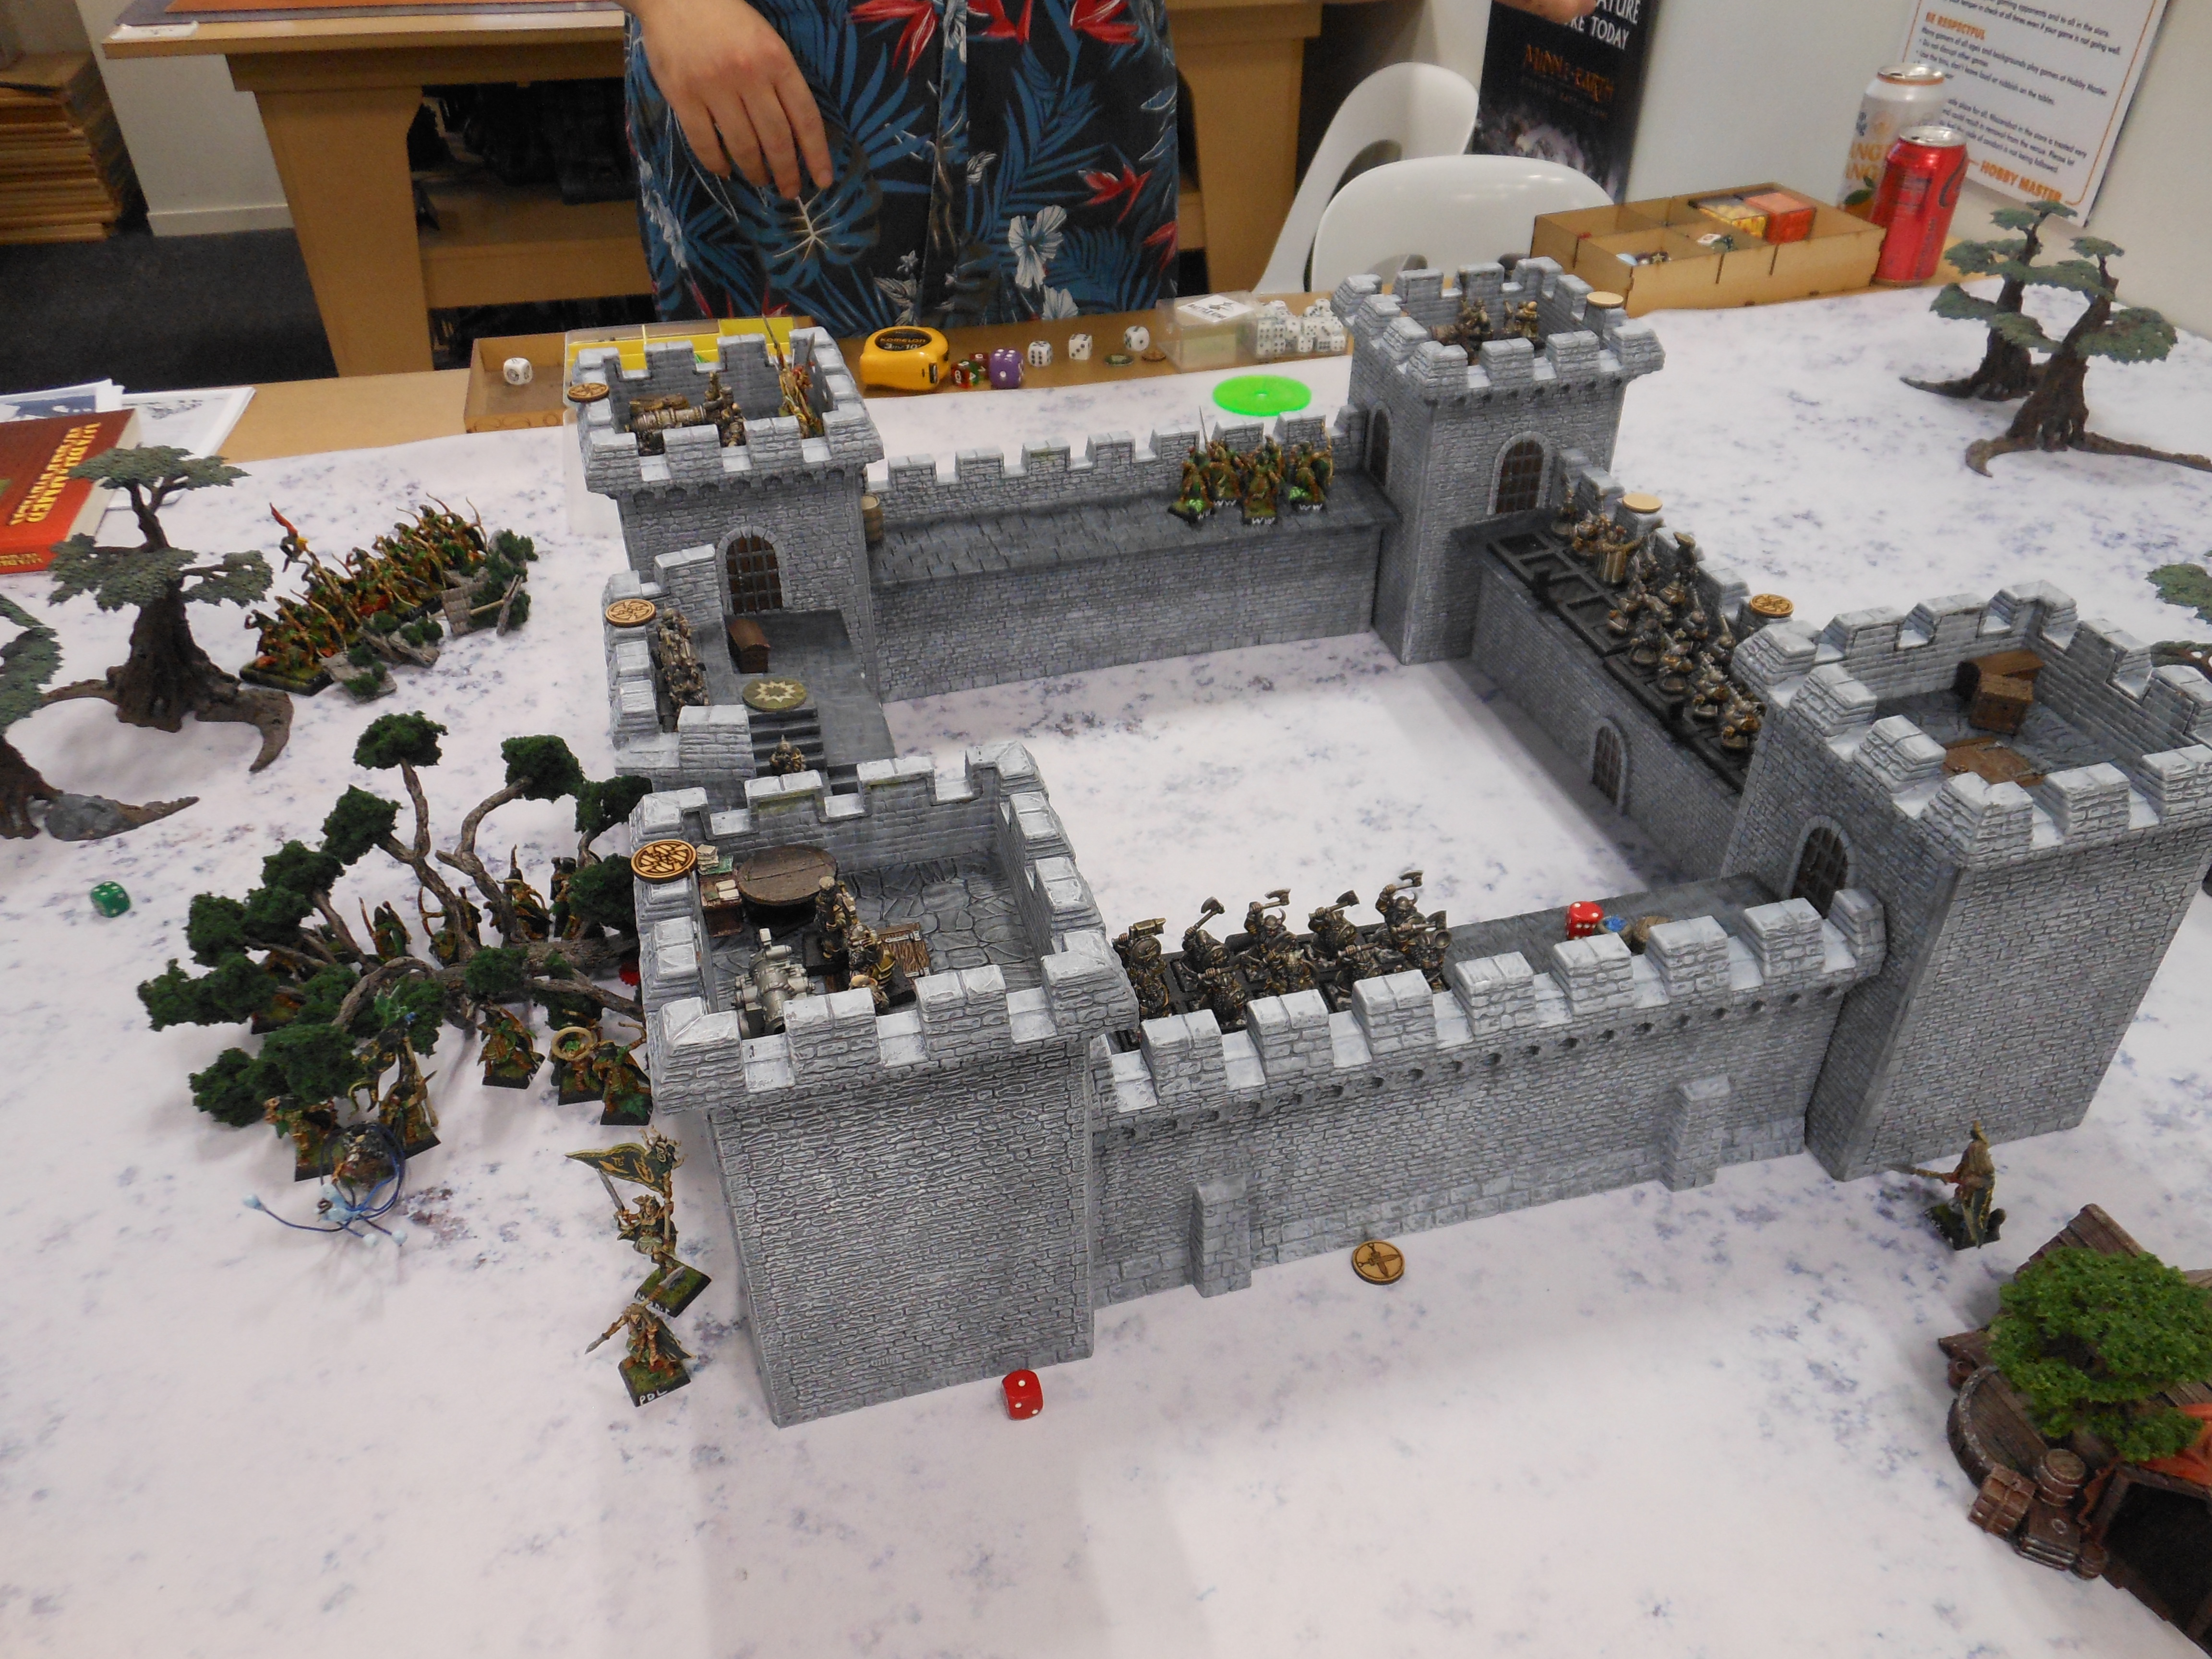
With the Wardancers in the castle out of harm's way, the rear and front right cannon crews train their guns on the Scouts that have just scaled the ramparts. The resulting crossfire of grapeshot sees the plucky Scouts annihilated in short order. The Thunderers and front left cannon open up on Summer Lightning, and manage to force no less than eight wounds past the Regeneration.
This is it. Now for my new two-pronged attack on the gate.
First the Wardancers on the ground fail to rally, but also don't flee too far from the castle. Next, their comrades on the castle make their move, springing from the front right tower and charging into the flank of the Thunders on the gatehouse. The surviving Dryads also charge the rear wall once more.
The remaining Glade Guard of Summer Lightning reform around the battering ram with Aneaeth, while Forever Autumn continues to close on the gatehouse as fast as they can. Moniqeth and her Eternal Guardian companion begin to make their way away from the castle.
The magic phase sees Aneaeth cast Call of The Hunt on Summer Lightning, though a similar attempt by Ailyn on the Dryads is dispelled.
The shooting phase again sees little results.
At the rear wall the Dryads fail to land any wounds, and the Dwarf Lord finally has enough of their harassment, leaving only the Branch Nymph alive by the time his attacks are resolved. The surviving tree spirit very understandably flees for what will turn out to be the last time.
Then it all comes down to the gatehouse. The Glade Guard take their best swing at the gate with the battering ram, and with monumental effort manage to land a second Cracked! result. The Wardancers on the gatehouse fare much better, swiftly routing the remaining Thunderers there in a flurry of Strength 4 blows. The gatehouse is mine!
Turn 6
With the store's closing time now fast approaching, it all comes down to one final round of Dwarf shooting. If the Dwarfs can clear the Wardancers off the gatehouse, they will have successfully defended the castle. If not, the Wardancers will open the castle gates to the Glade Guard outside, who will pour into the courtyard and capture the castle.
The two cannons and the front of the castle swing around to the gatehouse and...
.... wipe out the Wardancers in a hail of grapeshot.
With that, the Wood Elves decide to cut their losses and make plans to withdraw, leaving the castle in the hands of the Dwarfs.
 |
| The castle is held! |
That leaves the end of the game with both sides having gotten complements on how awesome they look, and my opponent having such a great time that they eagerly hunger for more Siege games. They have since embarked on a massive expansion program of their Warhammer armies, resulting in me getting in a string of games with a 3000 point army in the following months. This leaves the battle as a resounding success!
RESULT: VICTORY
What Millitant Learnt
The noticeably lop-sided casualty rates belie just how surprisingly close this game turned out to be. Even with the amount of damage they inflicted the Dwarfs ended up under pressure right up until the final moments, and I was still able to salvage some viable threats even after things started going really askew. Ultimately I was undone by the squashed deployment area on the table, which threw off my carefully synchronised multi-front offensive and left my units attacking the castle piecemeal, rather than as the simultaneous overwhelming wave I originally envisioned.
Of course, the other side always gets a vote too and it must be said that the Dwarfs did a commendable job of crisis management and excellent target priority, managing to correctly identify the key threat that needed to go each turn just about every time. The Dwarf cannons were the clear MVPs here, not for the physical damage they inflicted but for how they managed to command my attention, immediately spooking me into focusing on them from the start and allowing the Dwarfs to get inside my decision cycle despite their largely static defence. This was most notable in me quickly opting to throw the Warhawk Riders at them, abandoning my plan for them and seeing the valuable flyer unit largely squandered.
Speaking of squandering, the Glade Guard were in hindsight also misused. The missile support they were there to provide turned out to be of very limited use - even Elves struggle to hit targets sheltering behind a castle rampart, and that's before you get to the challenge of actually hurting tough heavily armoured Dwarfs with arrows when you finally do hit one. They would have probably been better served with ladders acting as an immediate follow-on echelon for the combat skirmishers, shooting opportunistically on the way in and then scaling the walls after the combat skirmishers clear them to make better use of the troop mass that's probably their real value in a siege.
Similarly, I also wonder about the Warhawk Riders. While slamming them straight into the nearest cannon was most definitely a mistake, I can't help but wonder if instead of my original plan of sending them in alongside a Wardancer unit they might have been better off using their flying movement to bypass the walls entirely and intercept the courtyard Warriors. It would have certainly meant the destruction of the Warhawk Riders themselves, but the sacrifice could very well have slowed the Warriors enough for me to get both units of Wardancers up the castle walls uncontested, and that alone might have made a big difference despite the wonky deployment.
The Dryads, on the other hand, did very well. They may not have inflicted a single casualty the entire game, but they did an admirable job at tying up the Dwarfs on the rear wall and preventing them from moving over to more important sectors.
Finally, I could have probably made better use of my magic throughout the game. While the one-two combination of Ariel's Blessing and Call of The Hunt was serviceable enough, there were a number of missed opportunities to make use of other spells. Fury of The Forest in particular could have been just about the only realistic way of giving the cannons any grief in hindsight, and while I never rolled them in the first place I can see some value in a well-timed Twilight Host to level the playing field when assaulting the walls or even frighten defenders away from the ramparts entirely, to say nothing of bypassing walls and gates entirely with The Hidden Path. It seems that I've spent so much time thinking about what to do when I fail to cast a single spell the entire game that I never really stopped to think about what to do if I actually do manage to cast spells.
Still, I think I'm getting a pretty good grasp at the art of siege. Next time the Dwarfs won't be so lucky!
The Dwarfs had held fast and prevailed against every attack and stratagem the Wood Elves could devise against them. In the small hours before dawn, after a full night of fierce fighting, the Wishmaster of The Meadows of Heaven called a retreat. The Asrai gathered their dead and wounded and vanished into the wilderness, leaving no sign of their presence save for those Elves still left on the battlements and a great jagged crack rent in the castle's gates, for which the battle would later take its name.
The aftermath of the battle would see a change in fortunes for the Folk of The Fell Cellar. Lord Roland, when hearing of the news, was so impressed by the tenacious defence of the Dwarfs that he permitted them to settle in some rocky foothills on the frontiers of his domain, giving them their first permanent home in a great many years.
The outcome of the battle also forced the Wood Elves to treat them as a serious power in their own right, and the very following Spring the Meadows of Heaven signed a treaty of non-aggression with the Folk of the Fell Cellar, enforced by Elf hostages captured by the Dwarfs from the survivors of the fighting on the castle ramparts.
The Meadows of Heaven left the battle surprisingly intact for such a hard-fought engagement. While many of the regiments of elite troops that took part in the expedition were decimated, most of the expedition's core warrior kinbands and virtually all of the expedition's leadership were left largely unscathed, and would allow the Wood Elf realm to remain secure throughout the rest of the winter while they rebuilt their forces. Nonetheless the battle was seen as a sobering defeat for the Meadows of Heaven and resulted in a series of reforms in how that realm approached future sieges.
A brazen furious blast of thunder scattered the scream of the wind and split the black blanket of cloud overhead with a searing gash of lightning that left the world in darkness as suddenly as it arrived. Below the land was a sea of cold deep blue midnight strewn with lonely islands of timidly glowing fires - the only constant source of illumination now, for the moon and stars had long since turned their gaze away from such unbearable bloodshed.
It was in this deep blue darkness that Aneaeth Ollissin now worked, gliding across blood-speckled snow from body to body as she fought to undo as much as she could of the devastation before the castle gatehouse. Around her were the survivors of her escorting detachment of Summer Lightning Glade Guard, as much handmaidens and assistants as they were protectors, helping to triage and tend to the wounded Asrai that littered the snow and move them to safety, while a few stood watch in a perimeter around the way to the gate. Coolly glowing Spites wove among their feet as they scampered around the carnage to lift away arrows and fallen weapons, hold together wounds or pluck the golden leaves and loose jewels off the bodies of elves that could not be saved.
Through the gloom Aneaeth's keen ears could spy the harsh vulgar cheers and curses of the Dwarfs on the castle's battlements somewhere far above.
At once two of the sentries parted smoothly before the purposeful shape of the Wishmaster, his armour glinting in the twilight as he sent off and took in the messenger owls that swooped to and from from his shoulders.
"In case word has not yet reached you," said The Wishmaster as he stopped before Aneaeth, "We are leaving this place. This battle is over. What is the state of our casualties here?"
"Our dead are fewer than I had feared," Aneaeth replied, "Though we have suffered grievously here and have many, many wounded. It will take much time for even my magic to mend their injuries fully, and I fear for our warriors on the ramparts."
The Wishmaster cast a glance upwards towards the distant top of the castle. "I would not worry for them just yet," he said, "This Dwarf king is evidently no fool, he will recognise the value in keeping alive any survivors. In the meantime, focus on the task at hand here. Is our remaining stock of healing potions sufficient?"
"I'm not sure. For the moment we may have just enough, but it will still take time to-"
The Wishmaster cut Aneaeth off with a modest gesture. "Our losses at the rear of the castle are not as bad as here, spare none of our reserve potions here if you must and we can bring more from there. What we do not have is time, it has already been some moments since the last gun blasts and I am not willing to find out exactly how much longer this lull will last for. Ration out the healing potions to get our wounded movable as quickly as possible, just enough to get them to safety. Once we are away from this place we can administer to them more fully."
"Of course Wishmaster," Aneaeth replied, "Roland will not be pleased at this attack on one of his castles you know."
The Wishmaster nodded. "Roland cares much for the prosperity of his people and appreciates wealth as much as any Keigh-mon. We will pour our treasury and empty our wine cellars into his keep until his outrage is tempered."
"And the dwarfs?"
"They have fought well. The window for dealing with them by the spear and the bodkin has passed. We must now look to our other tools and weapons. I shall begin preparations to negotiate a settlement with them upon our return to Athel Loren. Now save these wounded, we have lost far too many this night already."
With that The Wishmaster turned and strode away into the darkness. Aneaeth still grieved for the elves lost this night, though it gladdened her to see her friend returning to his former self again once more.


